As part of the process of validating Portainer functionality across a range of Kubernetes distributions, we have the opportunity to experiment with the vendor installation /configuration tools that they make available. This week it's Talos Kubernetes, and Sidero Omni. Talos has been getting a lot of love in the community, and I wanted to see if it is as good as everyone says it is.. spoiler alert.. it is!
I wanted to use Omni to manage the creation of a Talos Kubernetes cluster, without needing to SSH into my VMs, or do anything on the VMs other than boot them.
So, I started.
The first thing I needed to do was to set up an Omni Account on their SaaS Service. For my testing, I used: https://portainer.omni.siderolabs.io/omni/
I then went through the validation process, and set my password. Once I had that I was able to login to that account.
You can see I have no machines, no clusters, nothing...

To get started, you need to download your ISO (or VM) customized image. This is an image that has the “call-home” pre-configured to ping back to your specific Omni account (and note, you can self-host Omni and in that case, it uses your self-hosted instance).
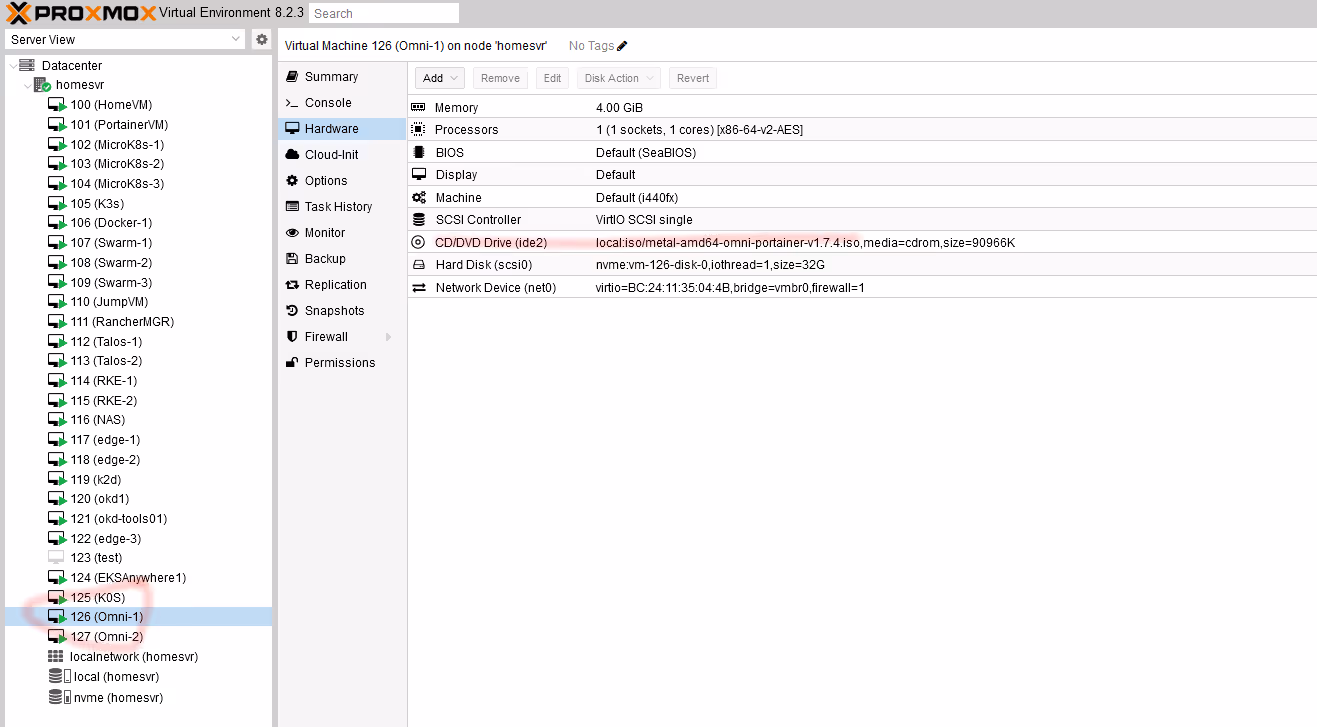
I then downloaded the ISO, spun up two VMs, and configured them to boot off the ISO… Powered them on, and did nothing more on them.
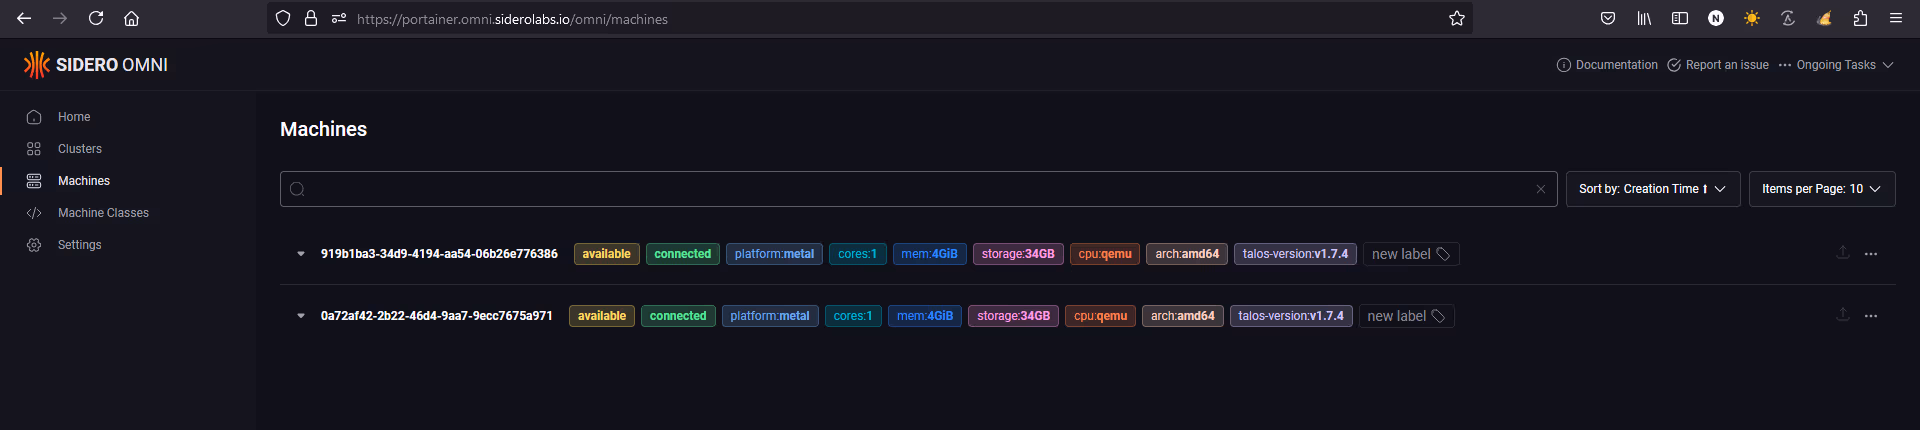
Switching back to Omni, I now see two entries in the “machines” view. Interestingly, its a UUID, and not immediately clear how to determine which is for each VM.
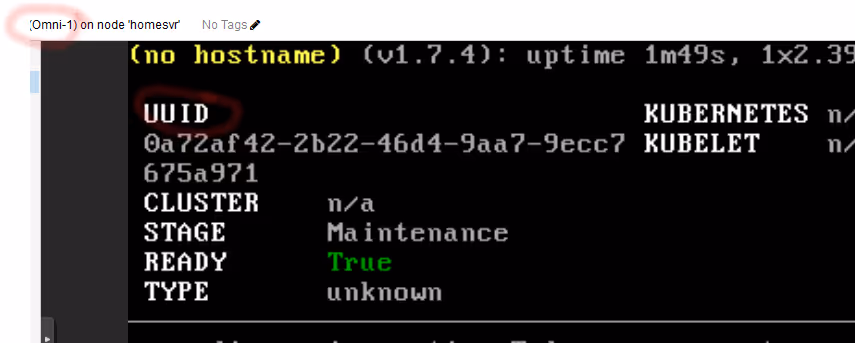
To understand which VM is which, I opened the console to one of the VMs. Here I can now see the UUID.
I also see its getting its IP from DHCP, which we will need to change.
Note that if you don't use DHCP on your network, you can configure a fixed IP directly via the console of the server.
So, let's setup a cluster. Go back into the Omni Web Page, click on Clusters, and then ‘create cluster’

Give the cluster a name, and set the nodes and their roles.. remember the UUIDs you collated before.
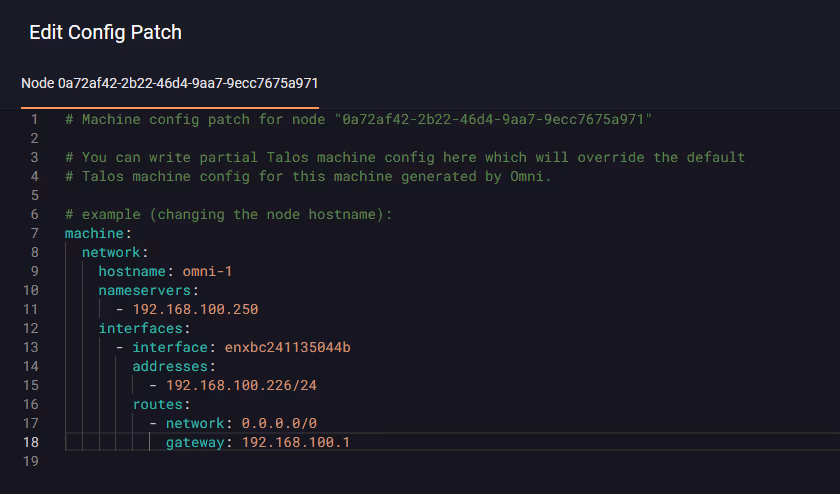
Now, before we continue, we will set the IP and Hostames of the machines to suit our needs.
Expand out the details for each node, and note down the network interface name for each (along with knowing which UUID corresponds to your VM). Also, whilst there, select the Kubernetes role you wish to assign each node (controlplane / worker).
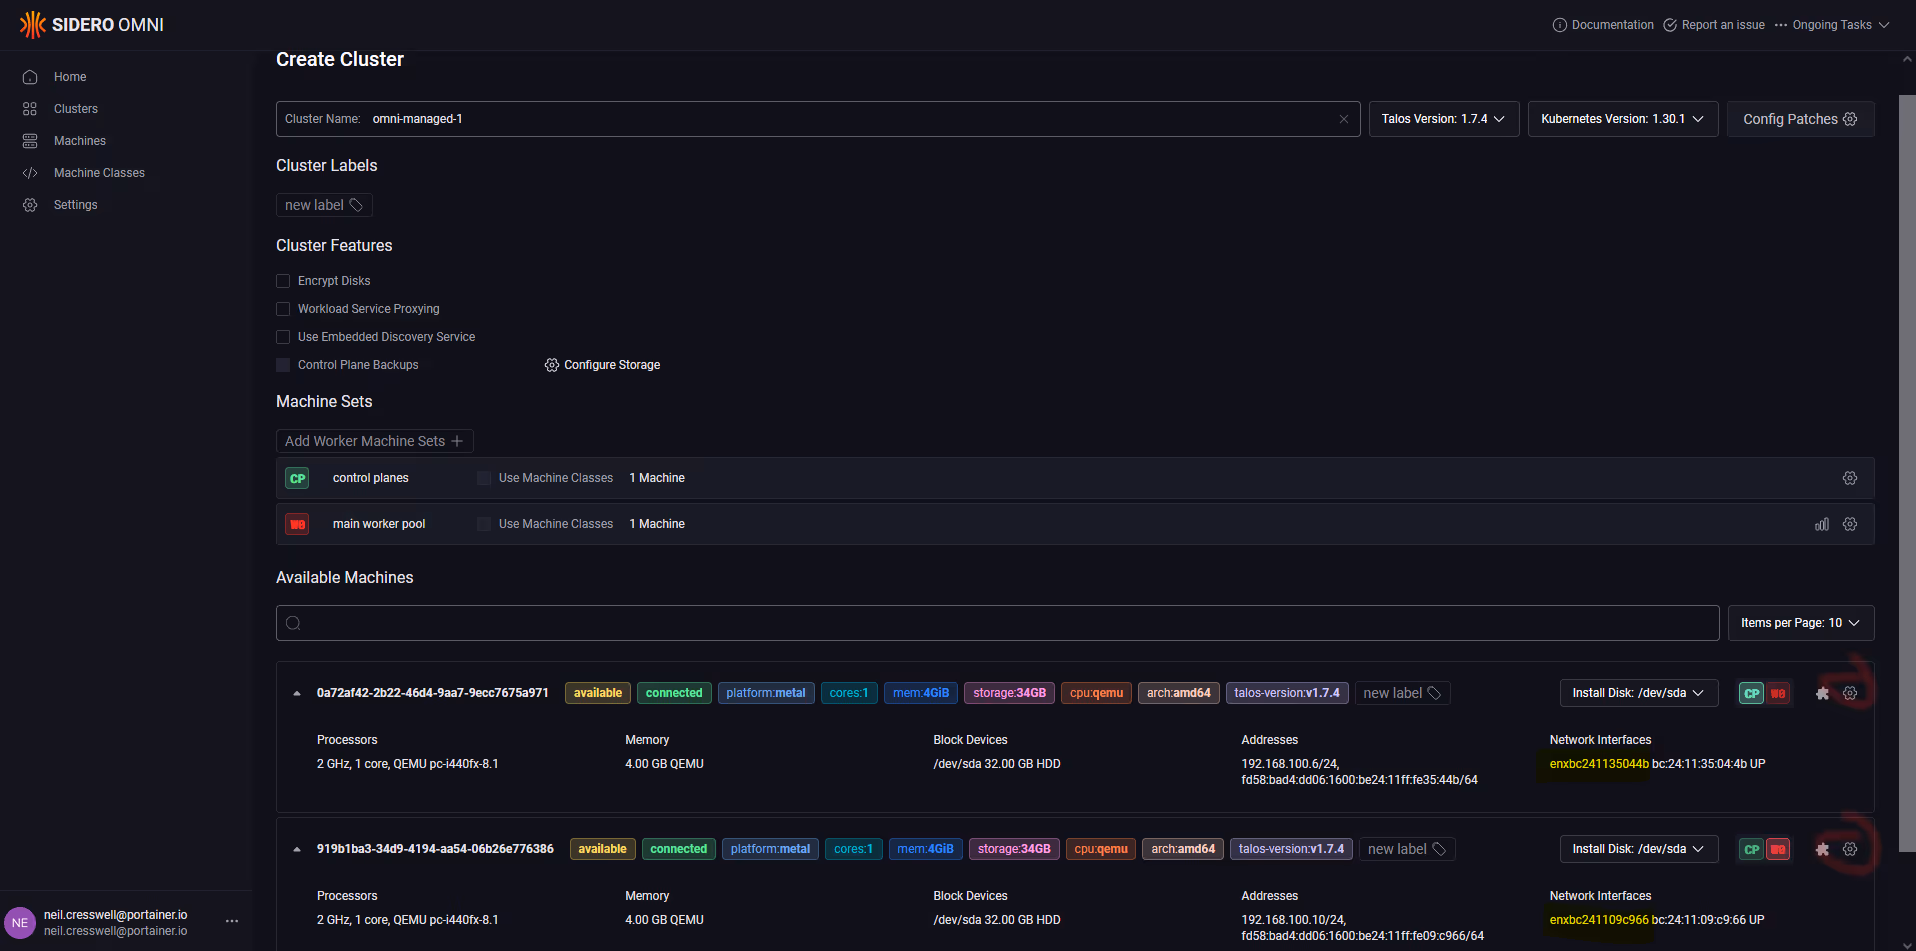
Click on the “gear” icon next to each of the nodes
Set your hostname and network details FOR EACH MACHINE as appropriate, then click save.
Once that is done, click “create cluster”, and wait 10 minutes.
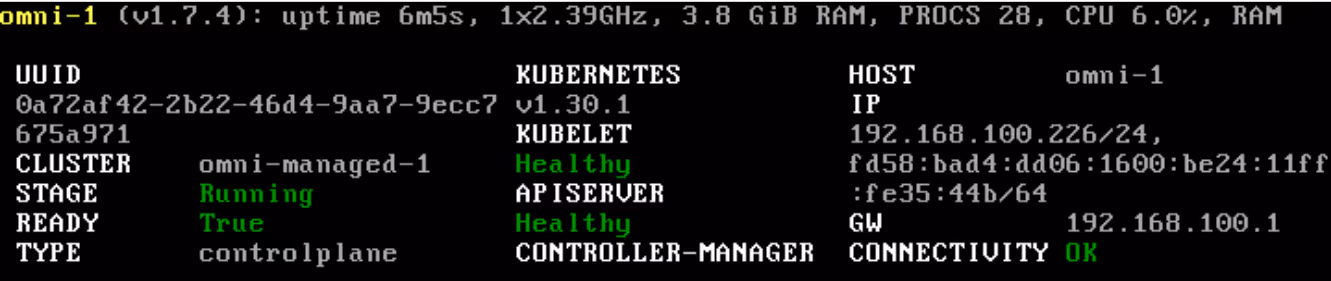
You can see the progress of the cluster creation.
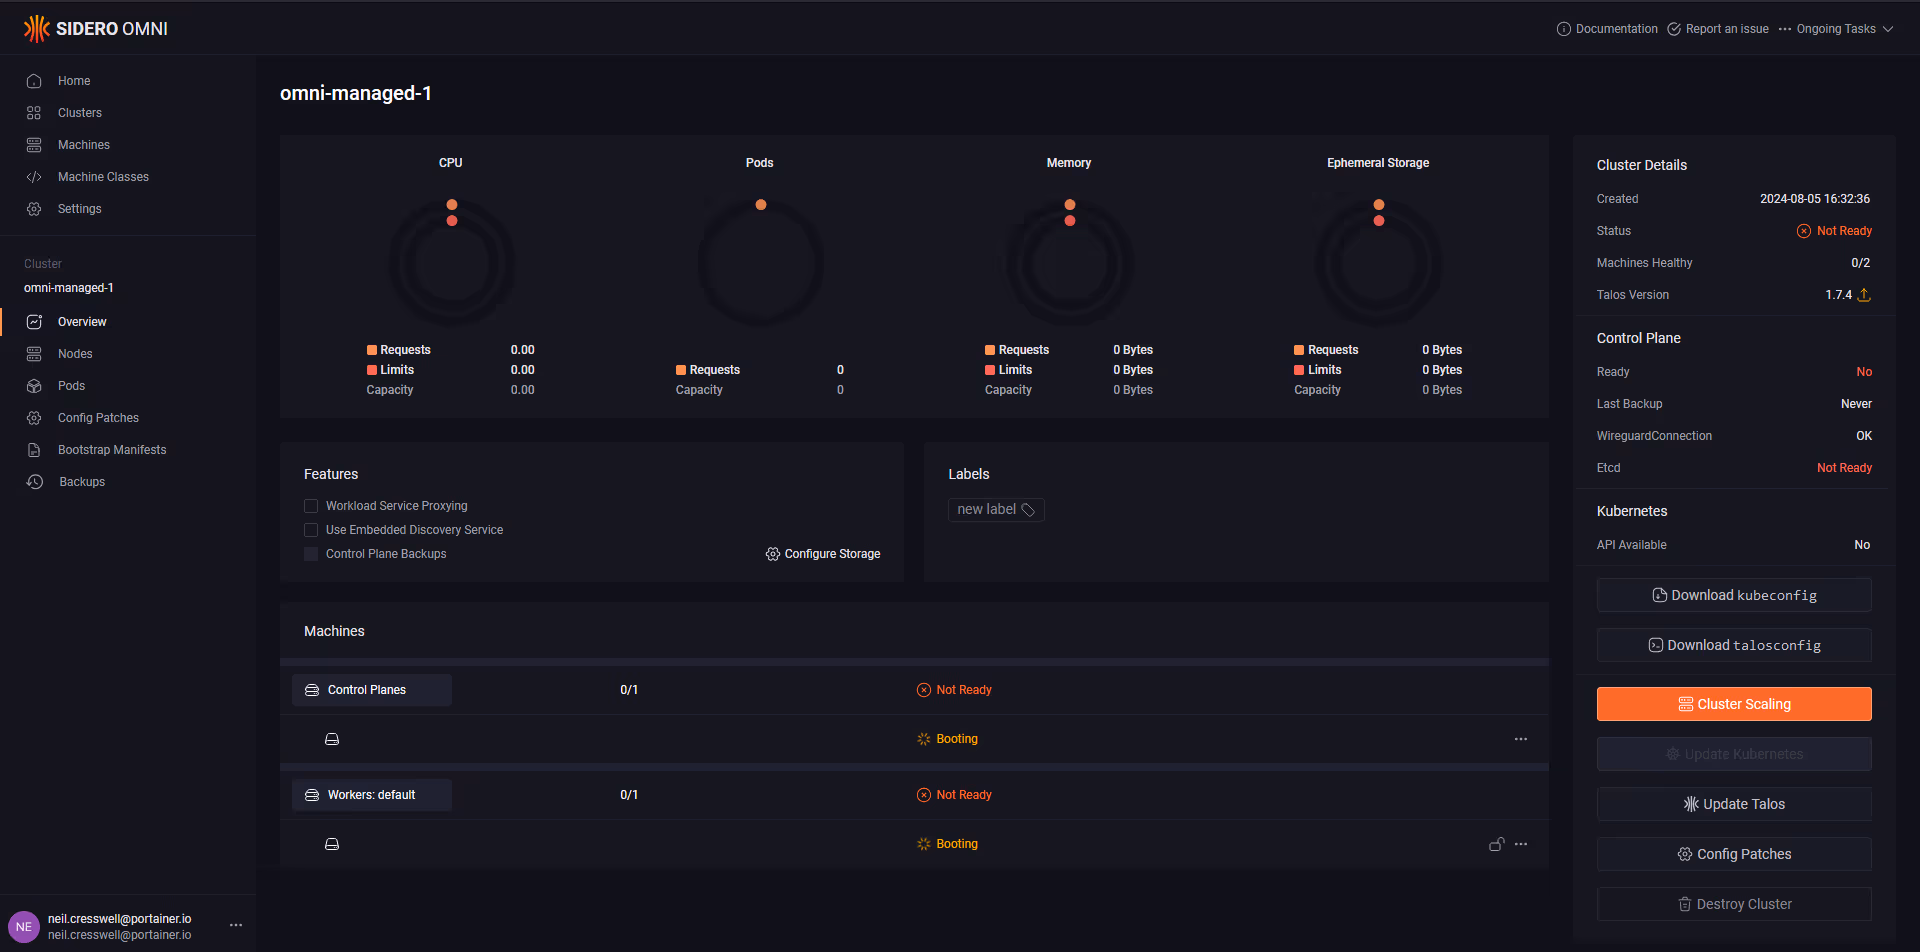
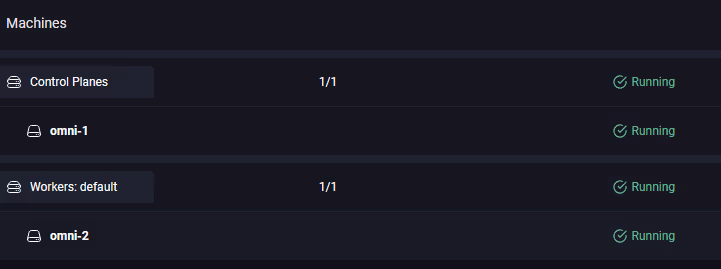
Wait for the nodes to change name, and be running, then you are good to go.
You can also see in the console of the nodes that the IP has changed.
So, now that the cluster is up, you can download the kubeconfig file, and then add the Portainer agent.

Note that once you download the config file, this is to access the cluster INDIRECTLY, which means, via Omni.
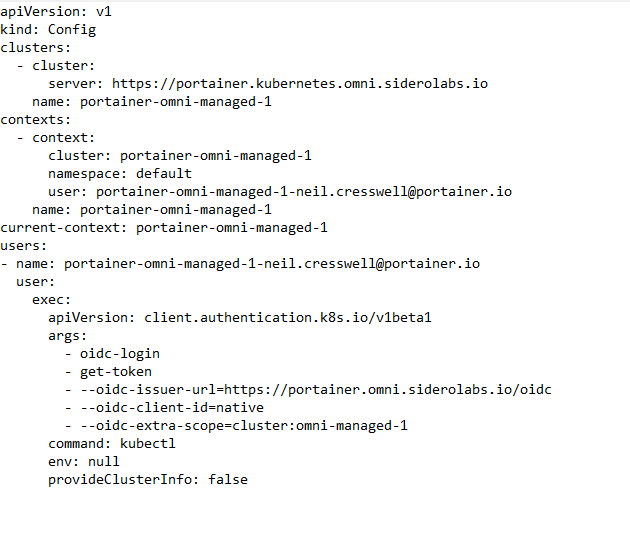
And on a standard machine, which just has kubectl binary installed, you cannot immediately use this file... you must first install the oidc extension to kubectl.

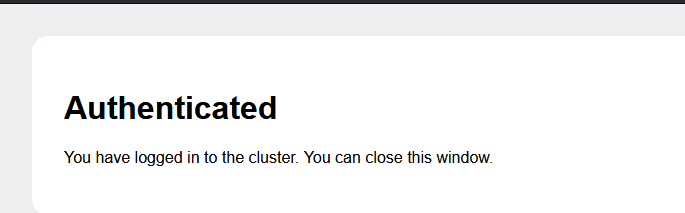
with kubelogin installed, you can now authenticate.
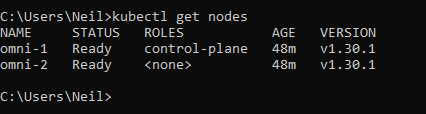
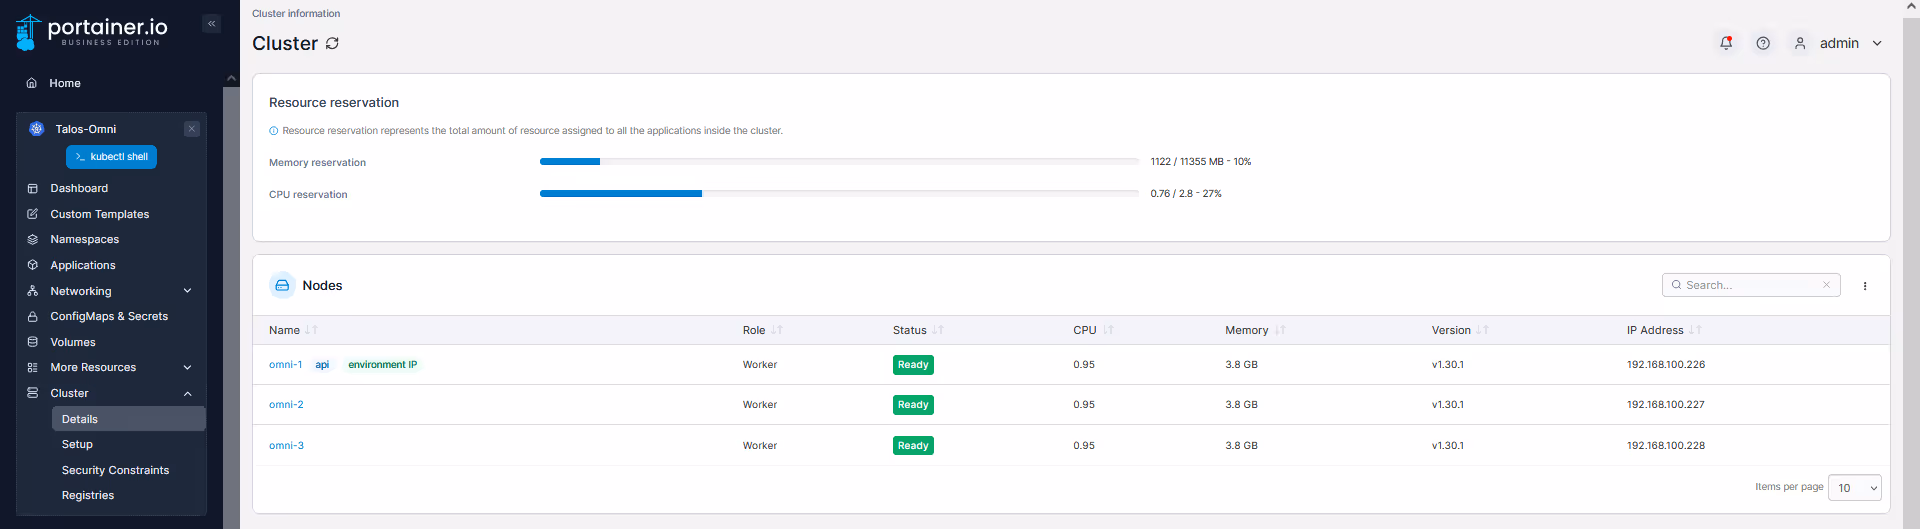
And you can see the nodes in the cluster.
Now we can add this cluster to an existing Portainer instance (or you can deploy a new Portainer instance if this is your first cluster).

Note you will get an error, due to Talos' explicit security policies, but we can amend this for the Portainer namespace
kubectl label namespace portainer pod-security.kubernetes.io/enforce=privileged
Then in your Portainer instance, add the Talos Cluster.
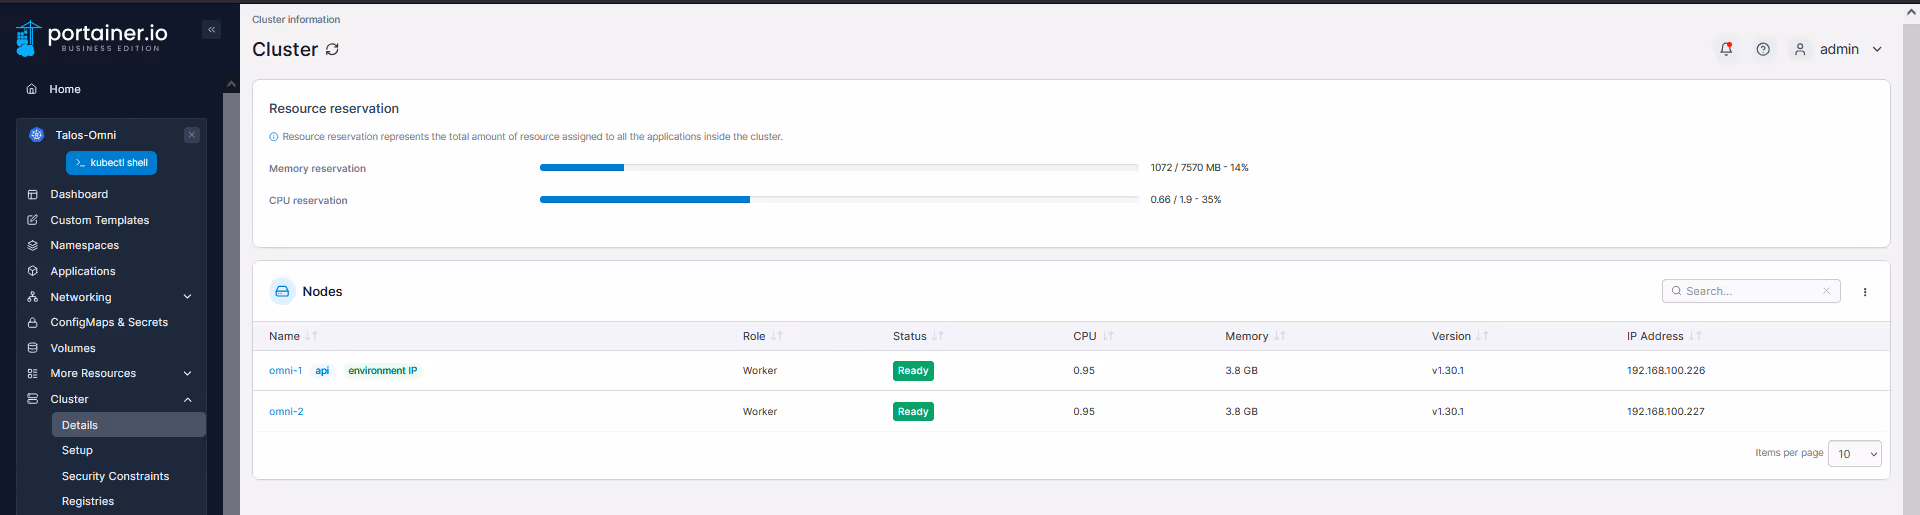
You can now perform all application deployment activities, and configure some base cluster settings (user auth, RBAC, security, quotas etc) all from Portainer.
I also wanted to see how easy it is to scale a cluster, so I decided to add another worker node..
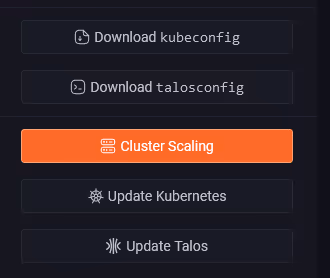
I booted another VM from the pre-configured ISO, went back into Omni, into the cluster, and clicked "Cluster Scaling"
I was presented my cluster config, and shown a list of machines not yet assigned to a cluster (just 1 in my case).
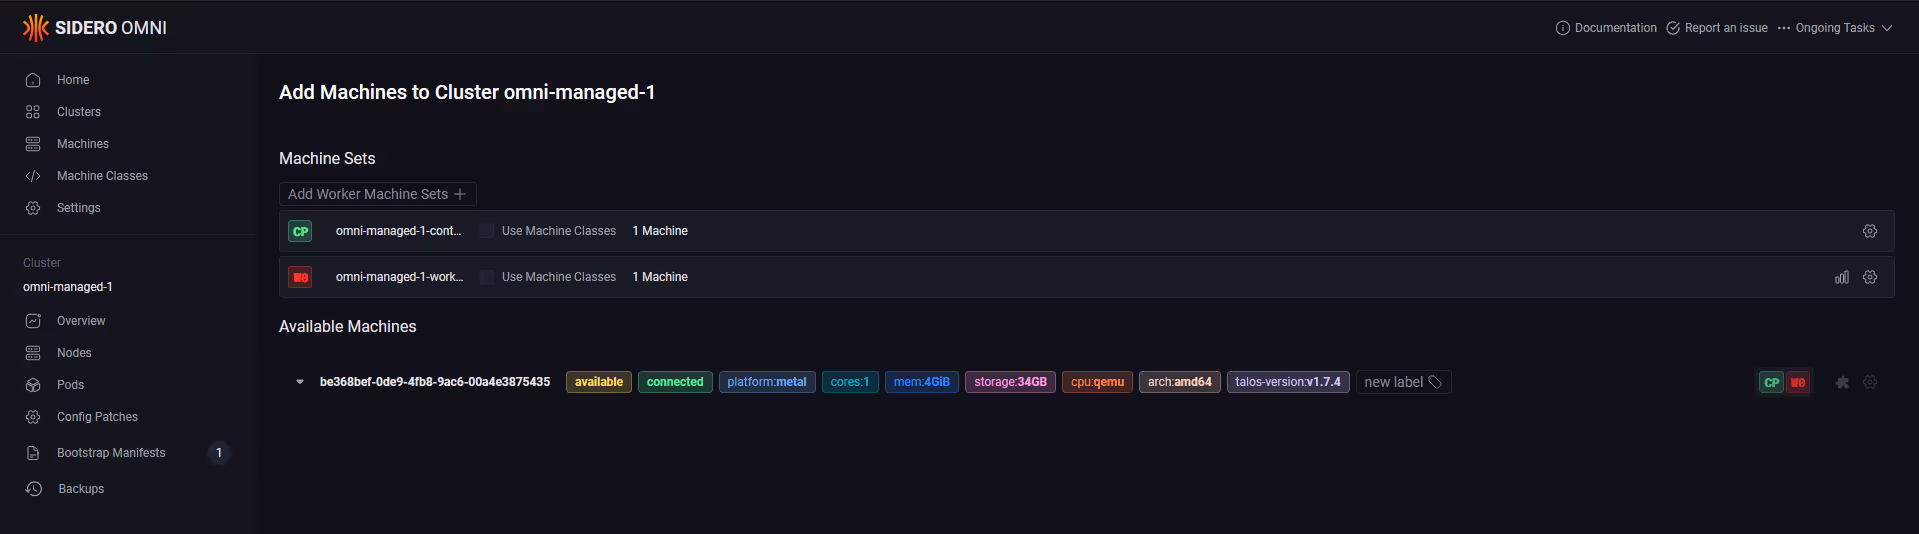
I repeated the same process, selecting it as a worker, and changing the network config using the machine config.
And done... I now have an additional node in my cluster, and I can see that node in Portainer too.
Final test, see how easy it is to update a cluster.
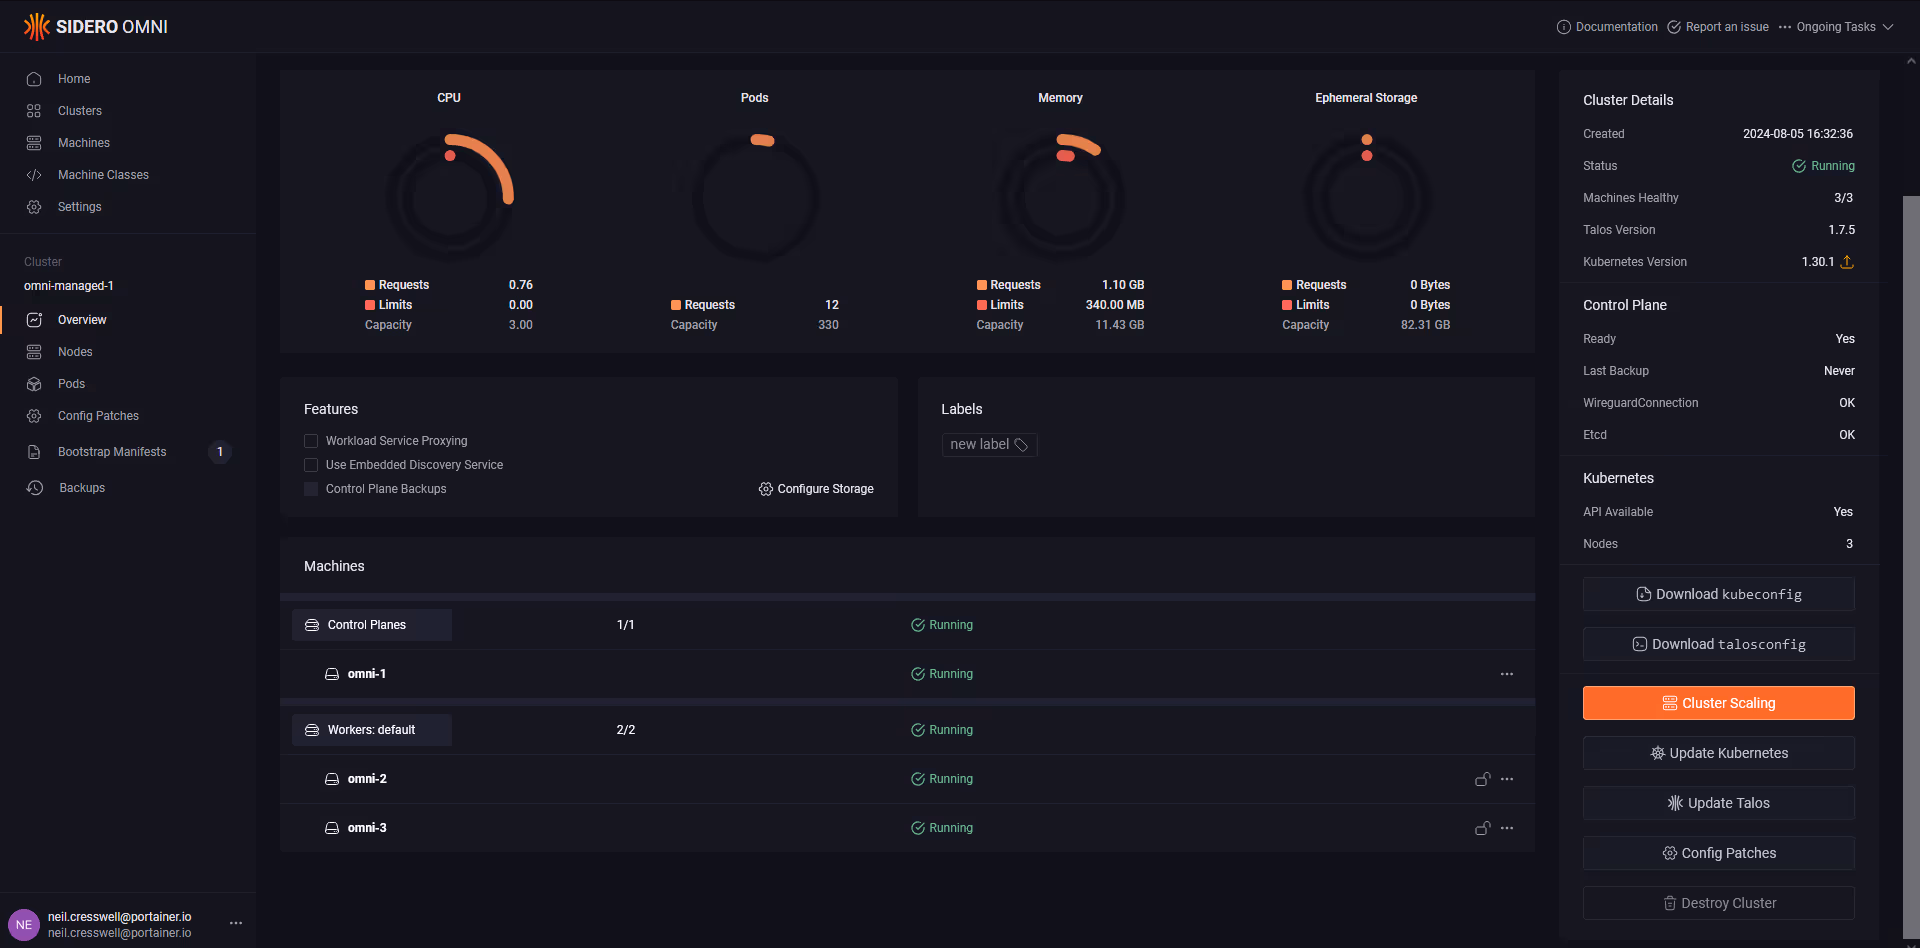
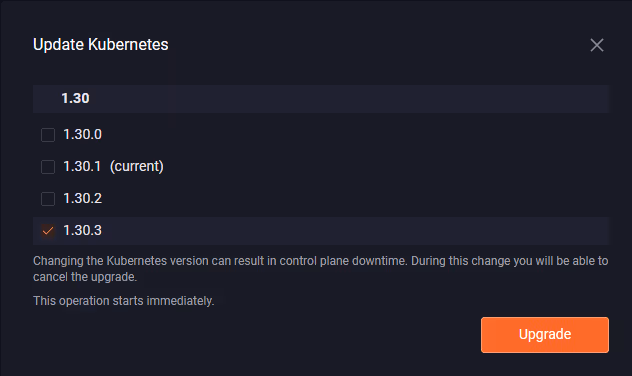
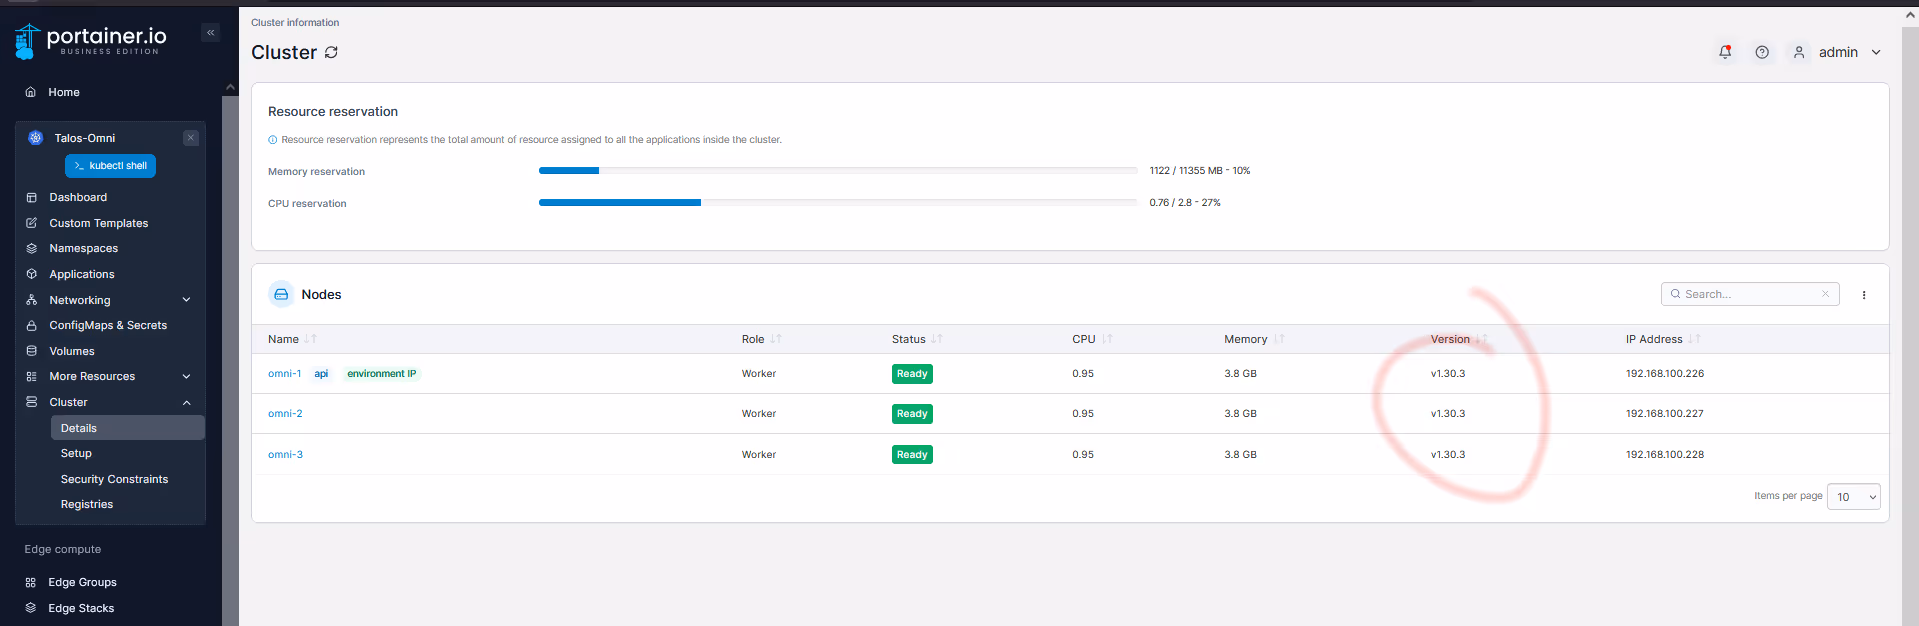
As you can see in the prior screenshots, I am running Kubernetes 1.30.1, and yet the latest version is 1.30.3. Lets upgrade.
You browse to your cluster, and in the right hand side, you can see your running version, and the icon indicator showing there is a newer version. Click it.

Select the version you want to upgrade to.. and click "upgrade"
You can see the cluster version status change... now you need to wait.
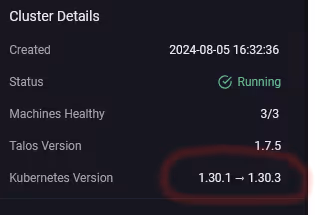

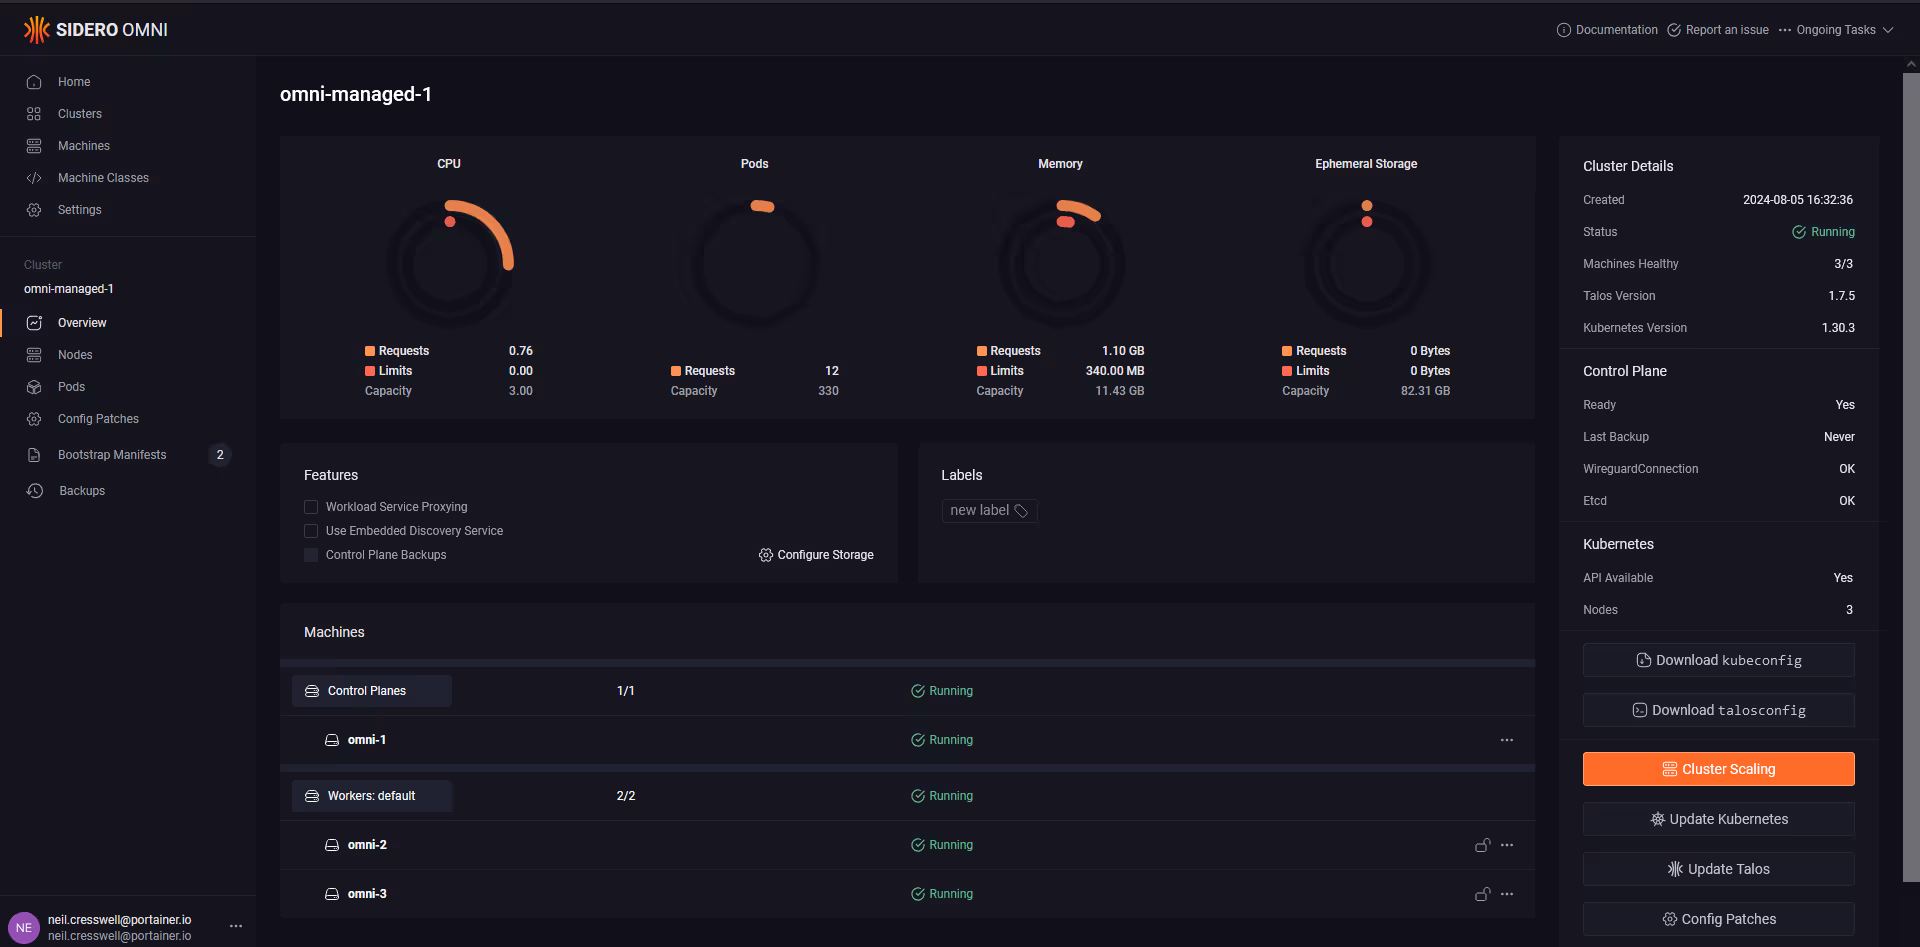
After a few minutes, you can see the cluster is now at 1.30.3... wow that was easy!
Some observations...
- It would be awesome to be able to auto-deploy a Kube manifest (ala Portainer agent) post-deployment (like how they assign/apply a machine/cluster config…
- Setting static IPs on the machines could have been more intuitive, actually set them at the machine level, vs only when creating the cluster.
All in all, the experience of using Omni and creating a Talos cluster was a breeze. Talos and Omni are significantly easier than any other distro I have used. I particularly liked the hands-off management, meaning I didn't need to touch the VMs themselves. Really impressive product and offering.