Overview
This blog post will walk through how to set up Cloudflare tunnels with WAF rules to host Portainer and Edge Agents protected by mTLS as per below:
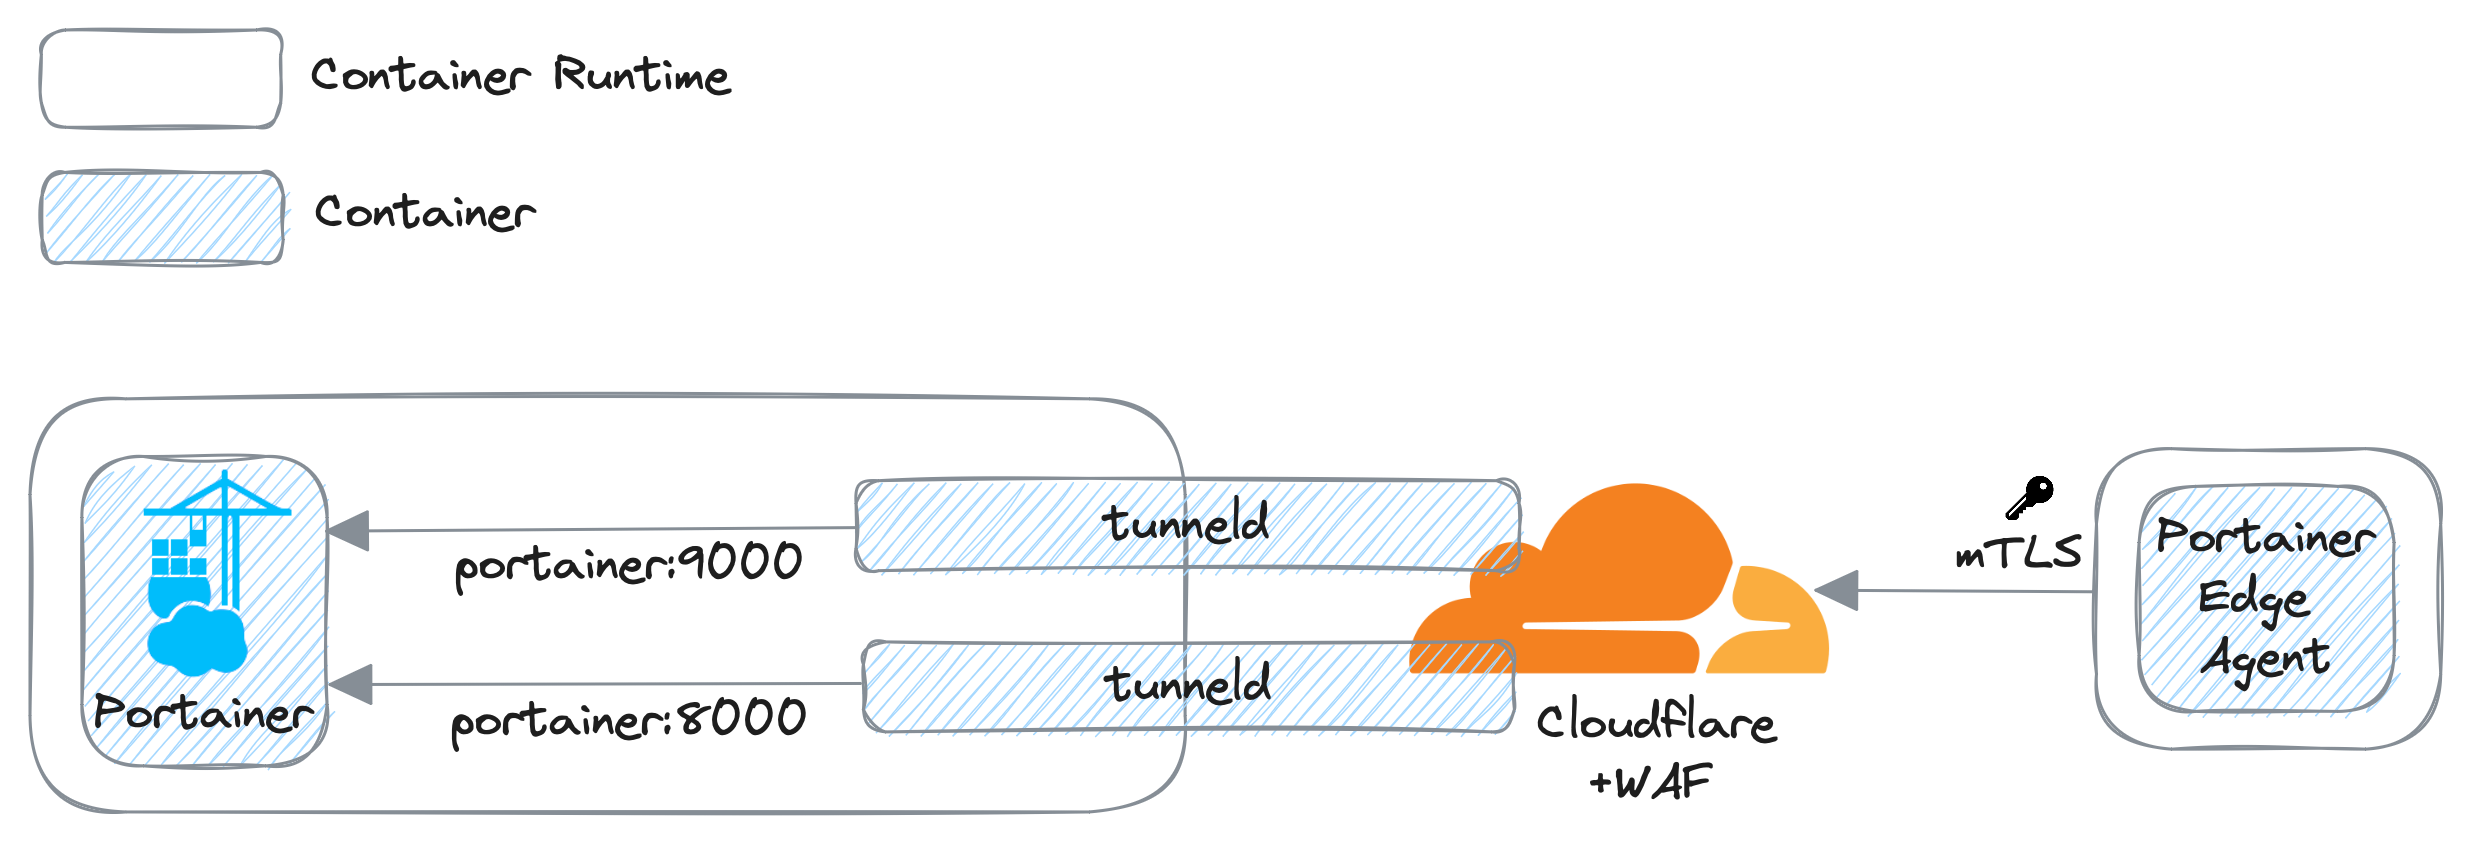
Disclaimer: This is a technical blog to demonstrate the implementation described above.
It does not cover end-to-end mTLS setup; instead, it is for only Edge Devices to Cloudflare, and the rest is handled by the Cloudflare tunnels with no mTLS.
Pre-requisites
Ensure the following elements are prepared before proceeding:
- 3 x Linux environments to deploy the Portainer server and Edge Agent containers.
- Cloudflare:
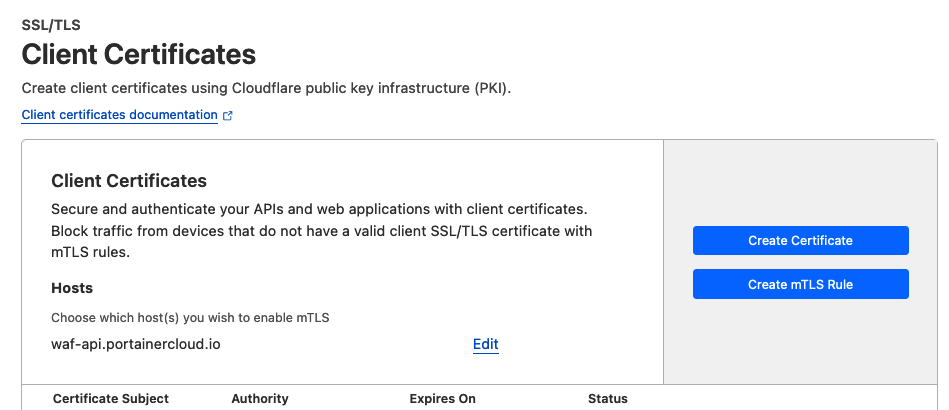
- Generate a Client Certificate for Portainer Edge Agents, and enable mTLS for the primary Portainer API endpoint published by Cloudflare:
- Enable Zero Trust to create Tunnels.
- Create a DNS zone to enable proxy.
- Generate a Client Certificate for Portainer Edge Agents, and enable mTLS for the primary Portainer API endpoint published by Cloudflare:
Demonstration
1. Spin up a Portainer Server core instance per this document in a container runtime environment. This uses a Docker standalone on Linux as an example:
docker run -detach \ --port 9443:9443 \ --volume /var/run/docker.sock:/var/run/docker.sock:z \ --volume portainer_data:/data \ --network internal-net \ --name portainer \ portainer/portainer-ee:2.18.4 --log-level DEBUGIt is crucial to ensure the Portainer server container runs on the same Docker network as the Cloudflare tunneld containers. This is to allow tunneld containers to communicate with Portainer with the name portainer on port 9000 and 8000 over the private Docker network. Exposing port 9443 (HTTPS) is mandatory to access Portainer UI.
Note: if you want tunneld containers to communicate with Portainer over HTTPS, which is what we recommend, the use of a public CA-signed certificate at the Portainer level will be mandatory. Specify the --hostname switch to match the DNS your certificate expects.
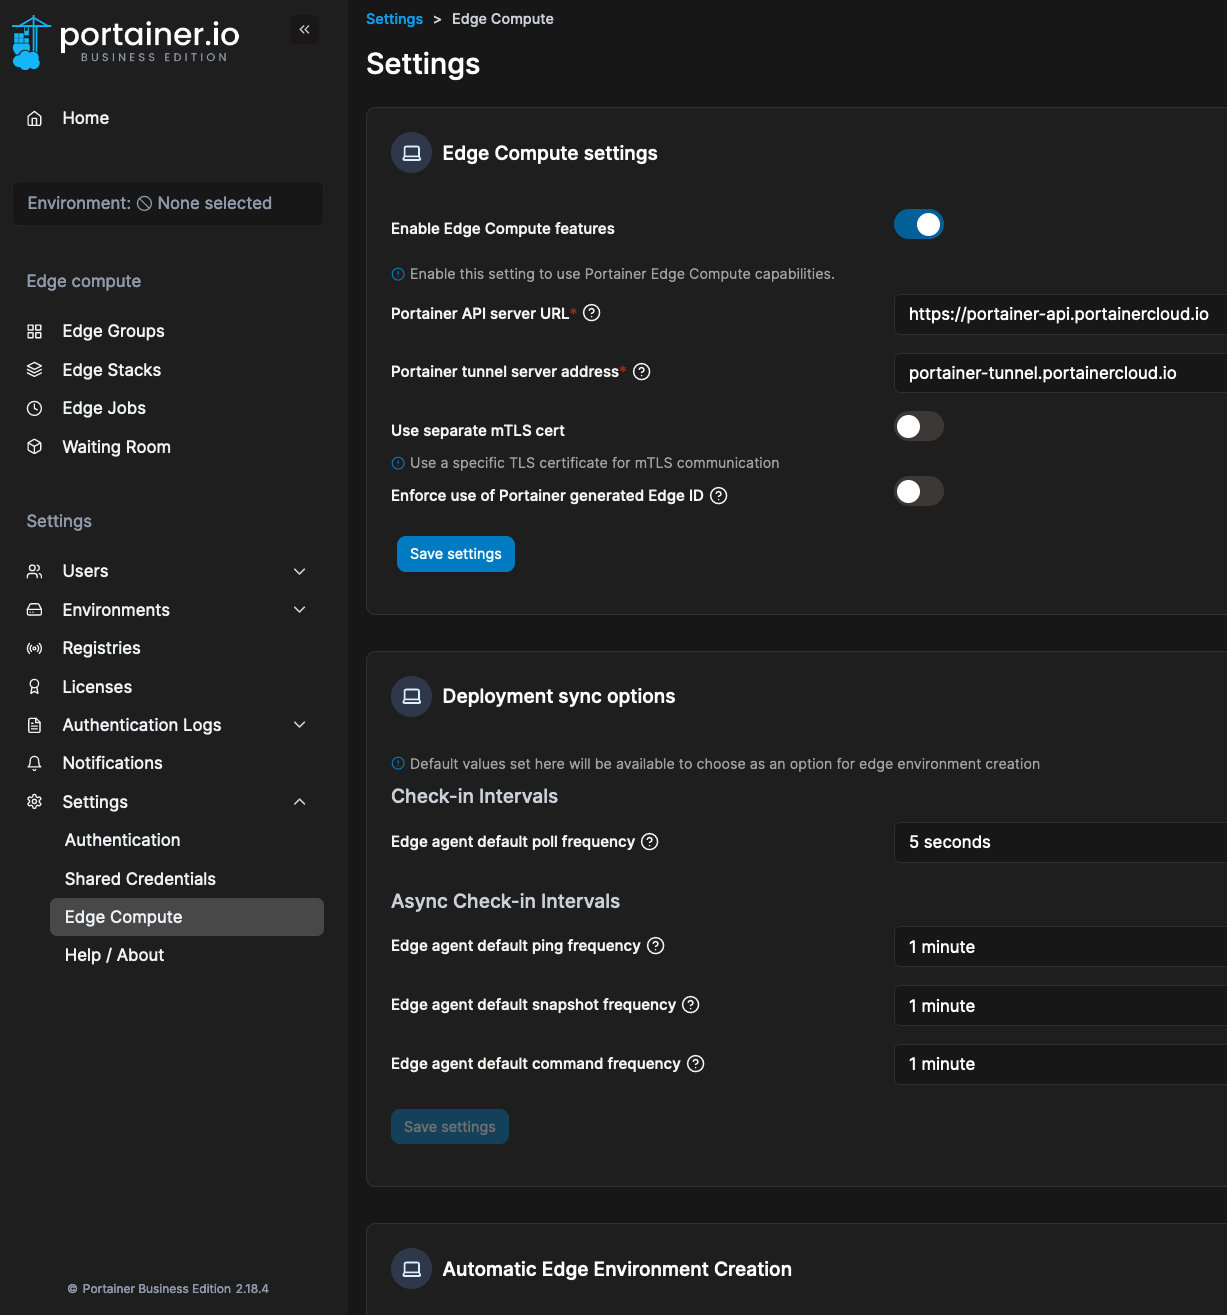
3. Next, navigate to Environments -> Auto onboarding, and record the Edge Key:

4. Now, two tunneld will be deployed to publish two Portainer endpoints; API and Tunnel. Navigate to Zero Trust -> Access -> Tunnels -> Create a tunnel:
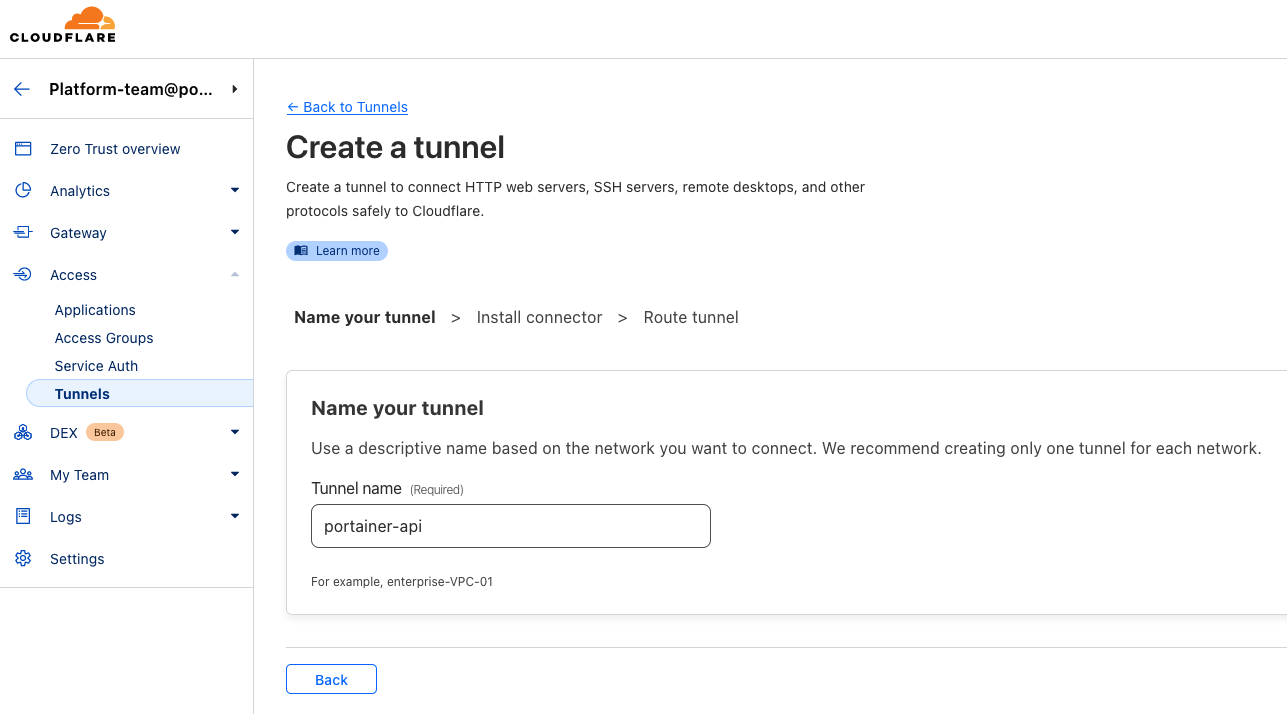
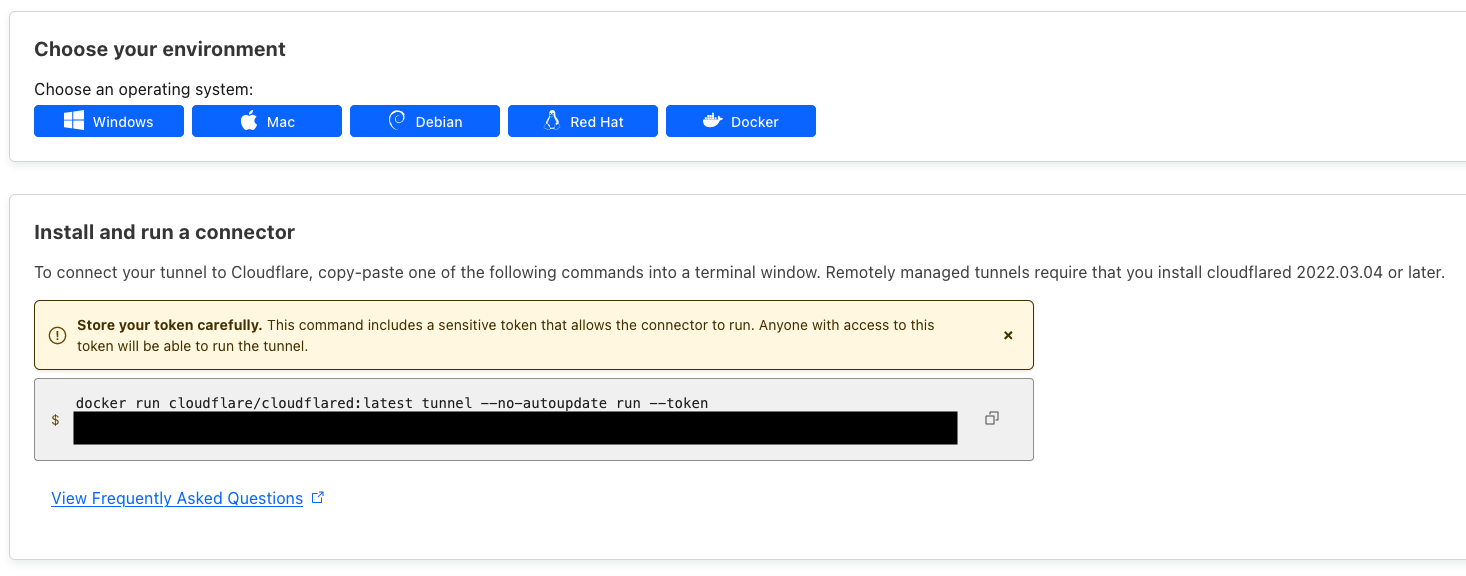
5. select Docker to install and run a connector once you go next. Record the token:
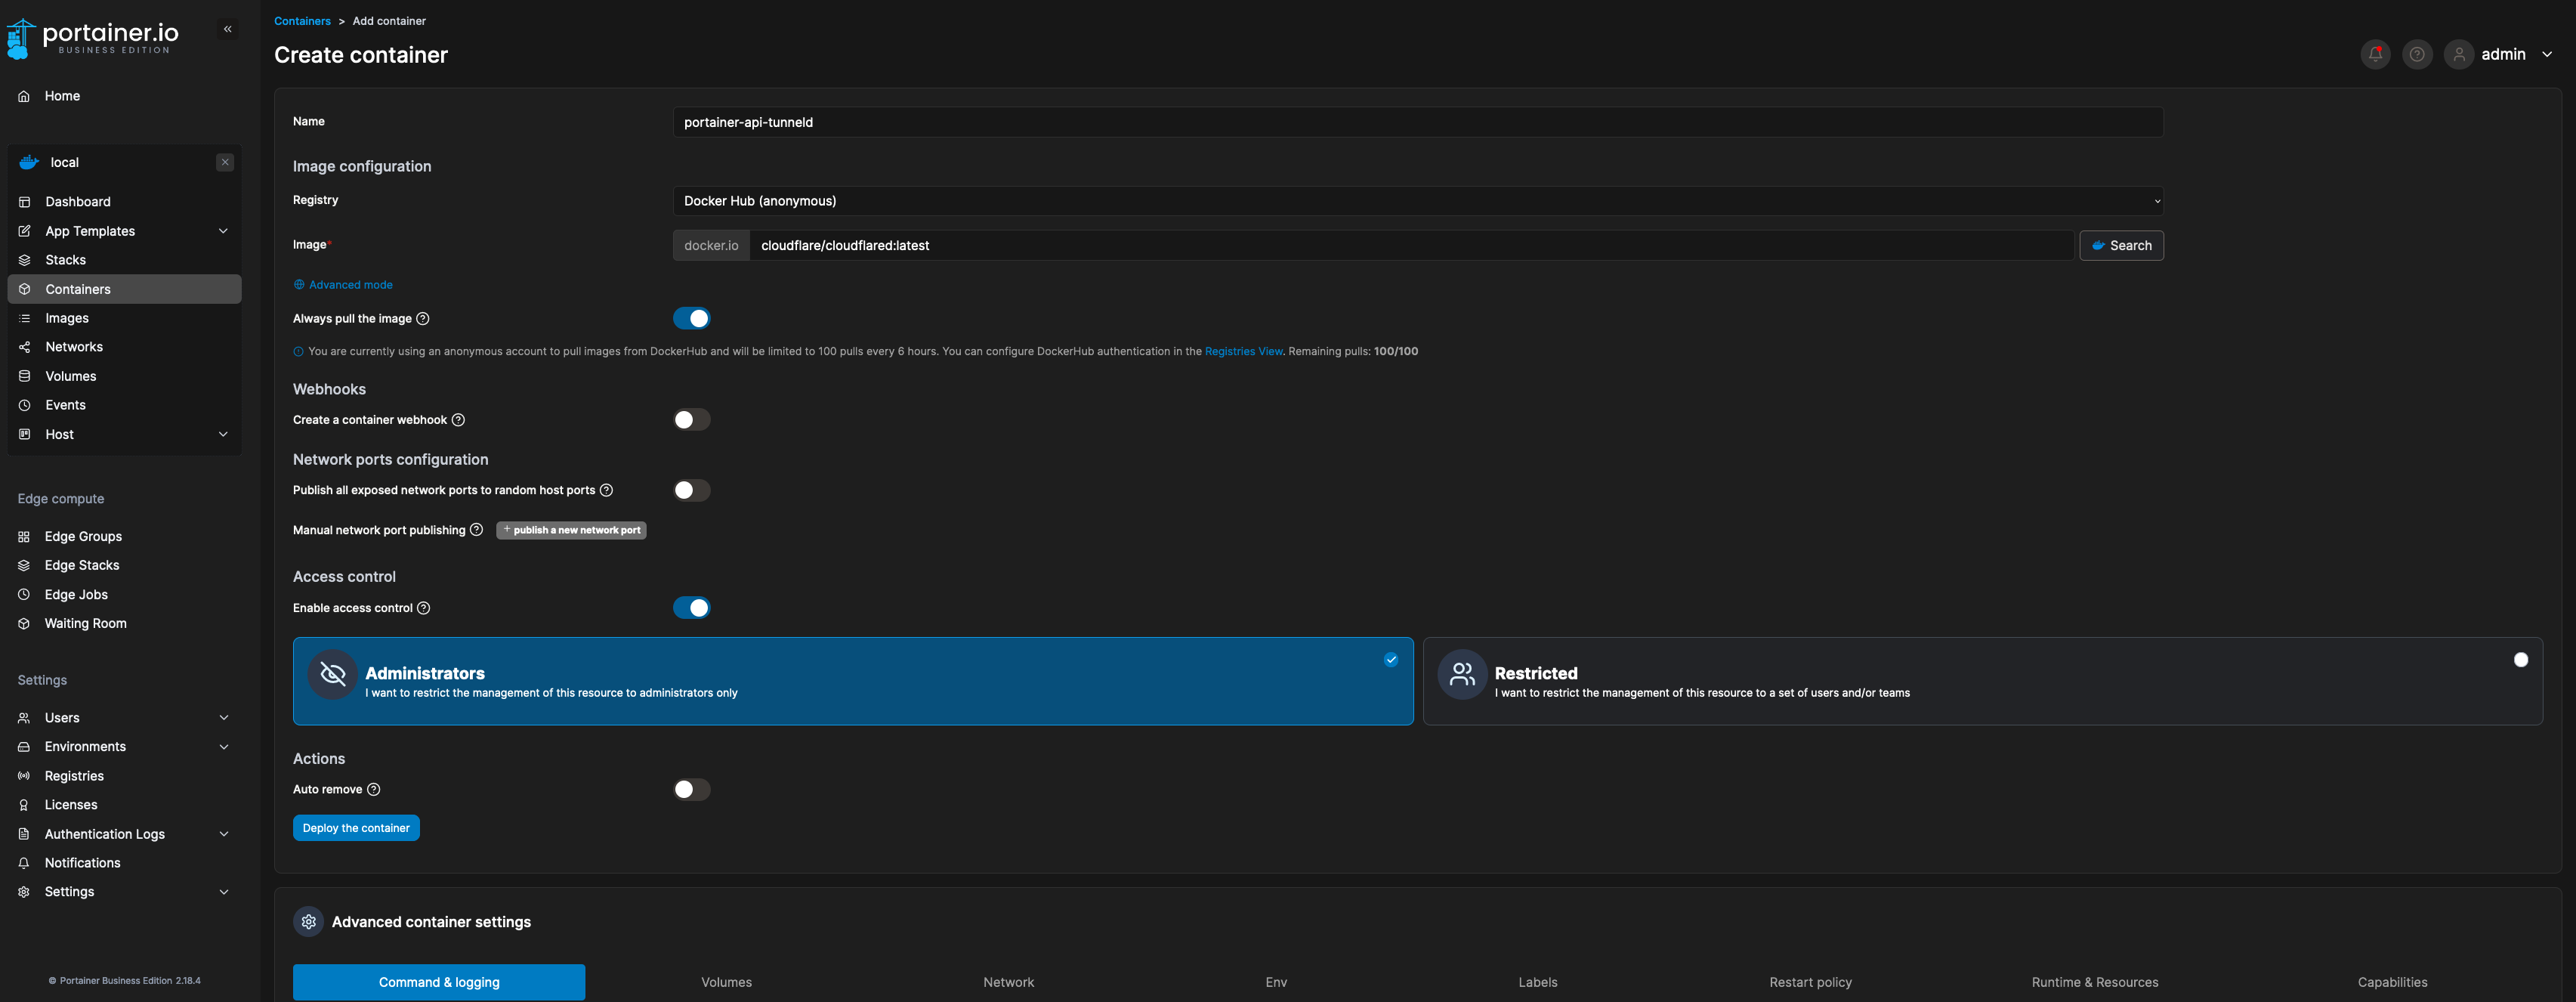
6. Back to Portainer, navigate to the Local environment where Portainer runs -> Containers -> Add container to deploy a tunneld container:


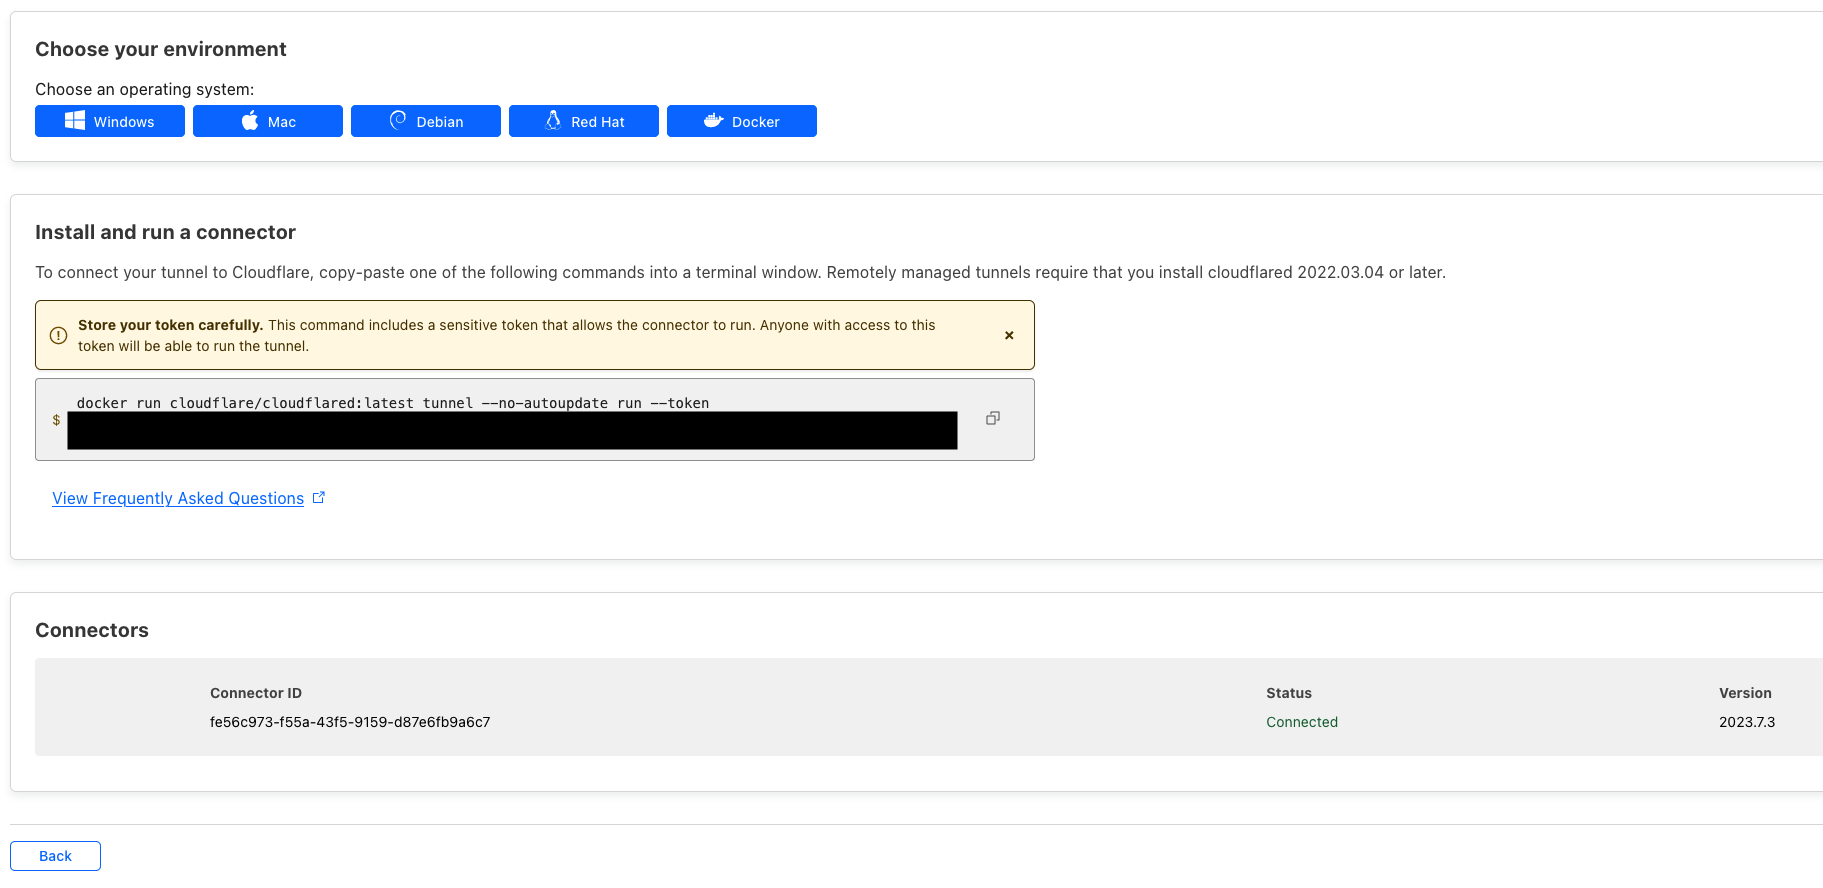
After a second, you will now see the connector details from your Cloudflare page:
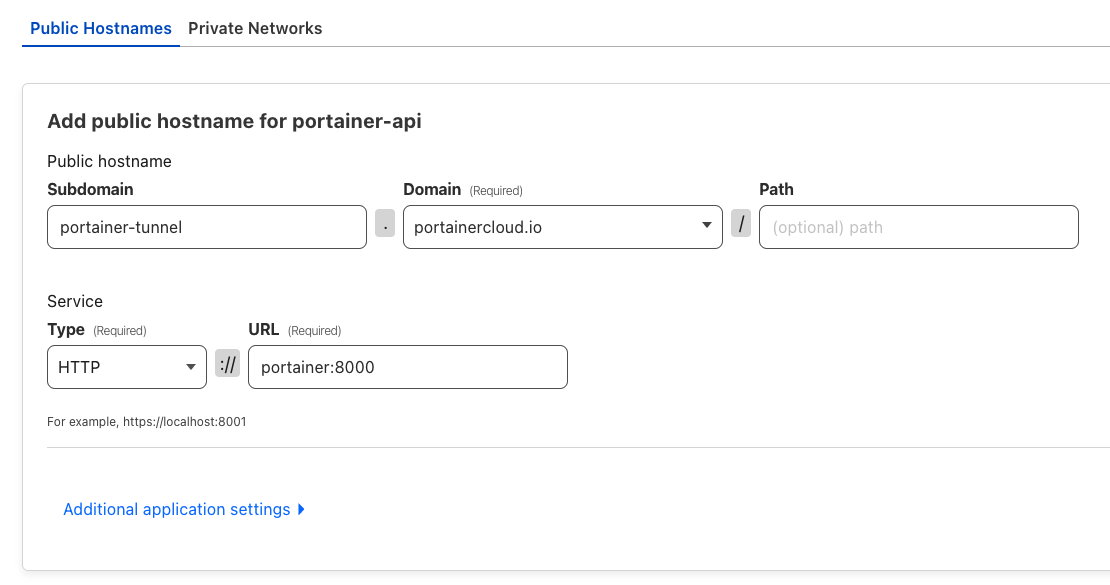
7. Next, set the public hostname. Below is an example:
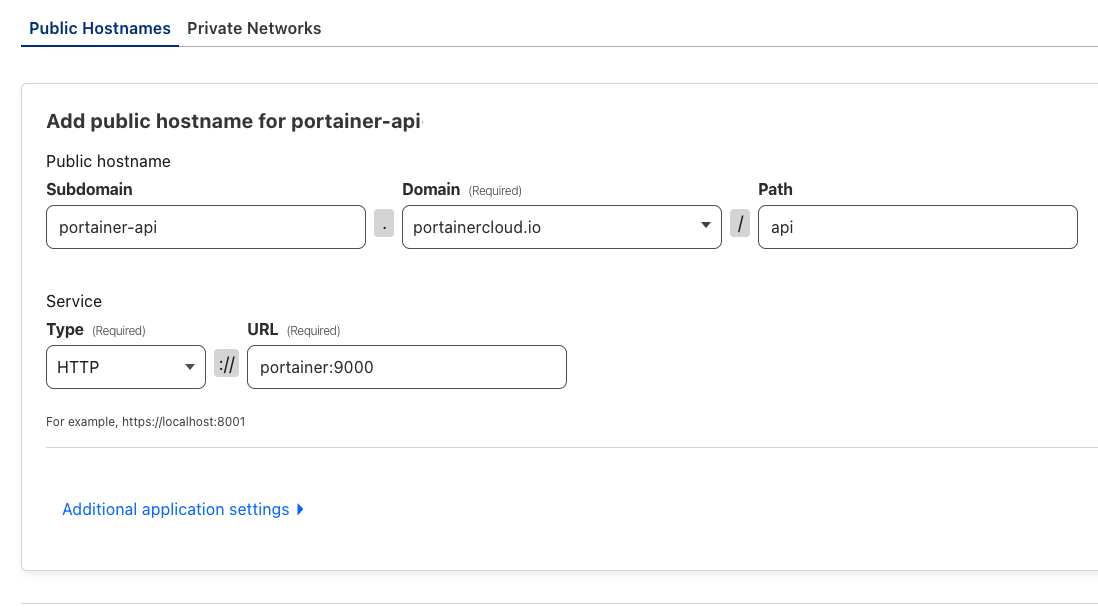
Since we only published the /api endpoint, executing a simple curl the command below would be sufficient to confirm that the endpoint is alive:
curl https://portainer-api.portainercloud.io/api404 page not found
If you are planning to run Standard Edge Agents, then repeat above steps 4-7 to deploy an additional tunneld container to publish below:
8. Time to protect the Portainer API endpoint with WAF. Navigate to Security -> WAF, and create a rule:
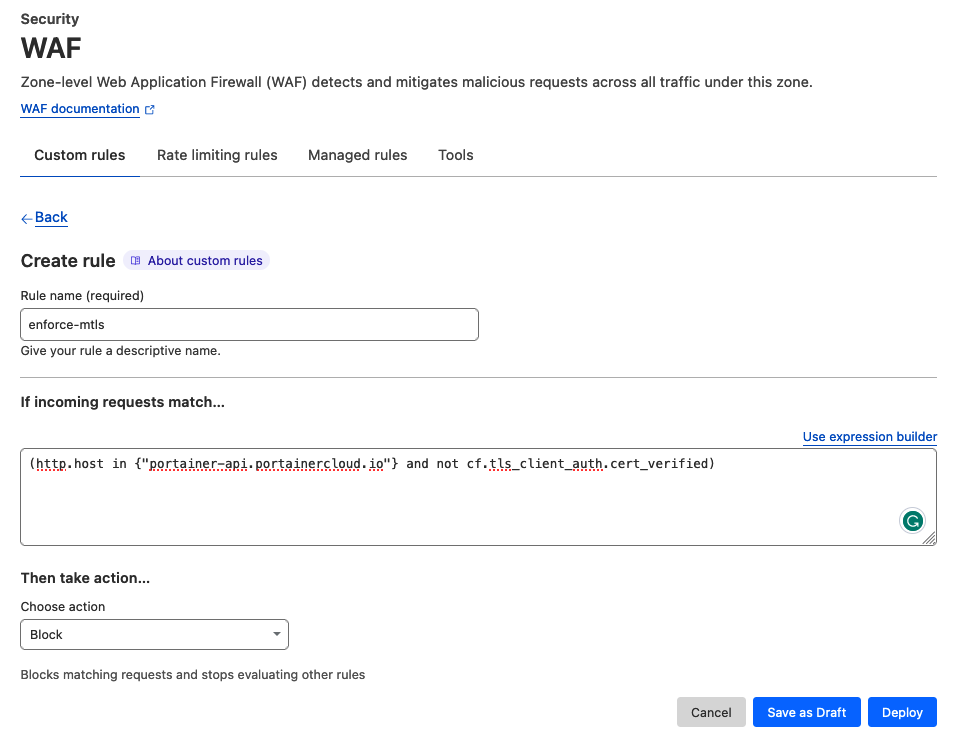
Rule: (http.host in {"waf-demo.portainercloud.io"} and not cf.tls_client_auth.cert_verified)
- http.host in {"portainer-api.portainercloud.io"} - this is to trigger this WAF rule if the DNS portainer-api.portainercloud.io is hit- not cf.tls_client_auth.cert_verified - this is to enforce that client certificates are presented to interact with the DNS above
Running the same curl operation again, you will now see a block message since Cloudflare signed client certificates were not presented:
curl https://portainer-api.portainercloud.io/api<h2 data-translate="blocked_why_headline">Why have I been blocked?</h2>
For further testing, direct to the folder where the client certificates are, and execute below to provide the client certificates:
curl --cert client.cert --key client.key https://portainer-api.portainercloud.io/api404 page not found
9. Time to deploy Edge Agents. SSH to the second Linux environment, and make sure the client certificates; client.cert and client.key are located under the directory /certs, and execute below with the EDGE_KEY recorded in step 3:
docker run --detach \
--env EDGE=1 \--env EDGE_ID=$(uuidgen) \--env EDGE_KEY=${EDGE_KEY} \--env EDGE_INSECURE_POLL=0 \--env EDGE_ASYNC=1 \--volume /var/run/docker.sock:/var/run/docker.sock \--volume /var/lib/docker/volumes:/var/lib/docker/volumes \--volume /:/host \--volume portainer_agent_data:/data \--volume /certs:/certs \--restart always \portainer/agent:2.18.4 --log-level DEBUG --mtlscert /certs/client.cert --mtlskey /certs/client.keydocker run --detach \--env EDGE=1 \--env EDGE_ID=$(uuidgen) \--env EDGE_KEY=${EDGE_KEY} \--env EDGE_INSECURE_POLL=0 \--volume /var/run/docker.sock:/var/run/docker.sock \--volume /var/lib/docker/volumes:/var/lib/docker/volumes \--volume /:/host \--volume portainer_agent_data:/data \--volume /certs:/certs \--restart always \portainer/agent:2.18.4 --log-level DEBUG --mtlscert /certs/client.cert --mtlskey /certs/client.key10. Navigate to Portainer -> Waiting Room, and you will see the device in the queue to be trusted. Associate the device to onboard it:

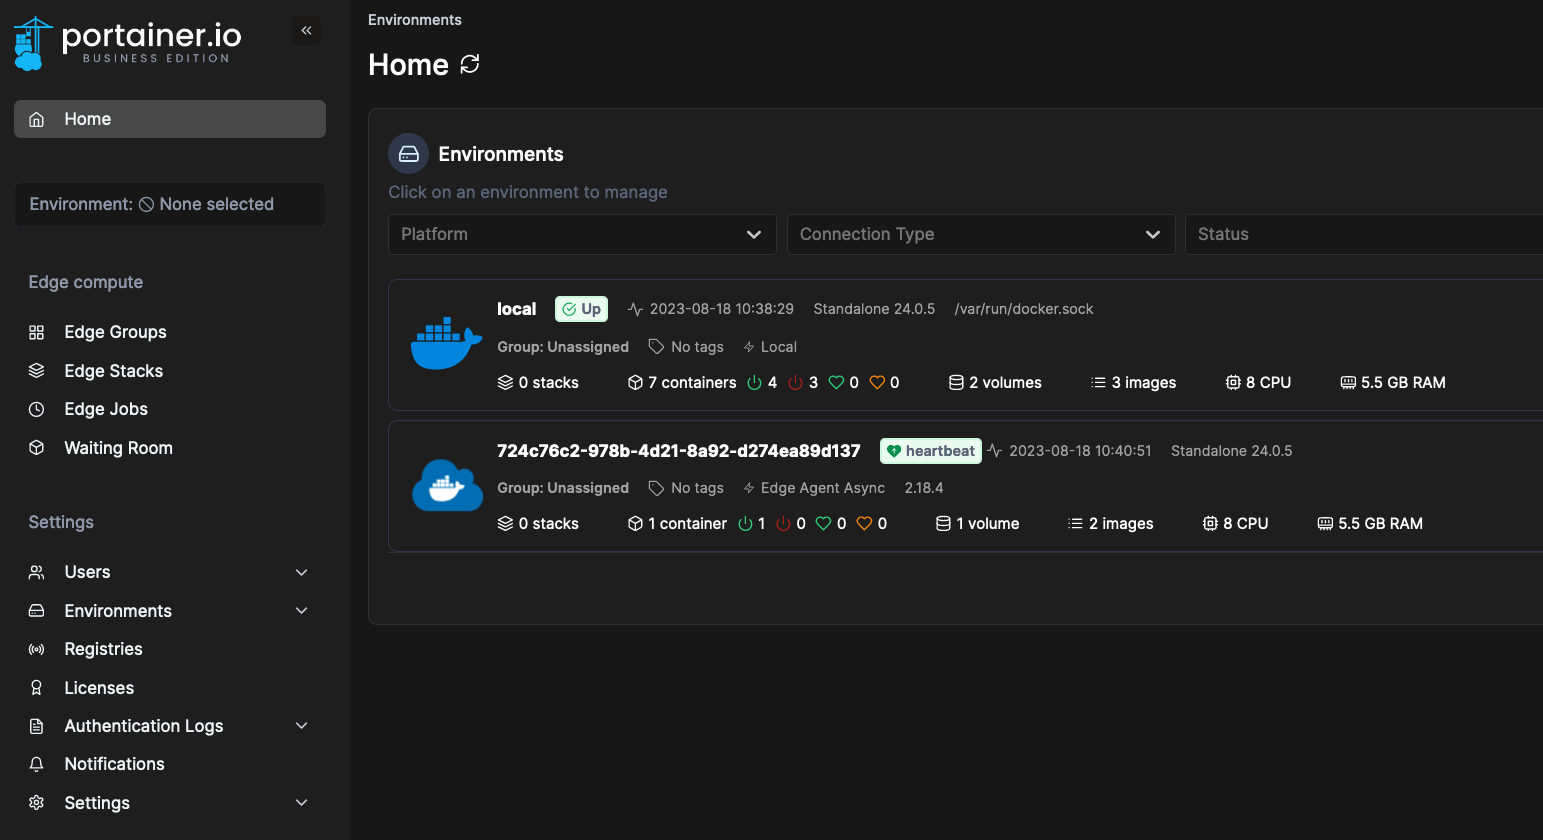
11. The device will now show up on the homepage of Portainer. Giving it a minute or two will take a snapshot as per below:
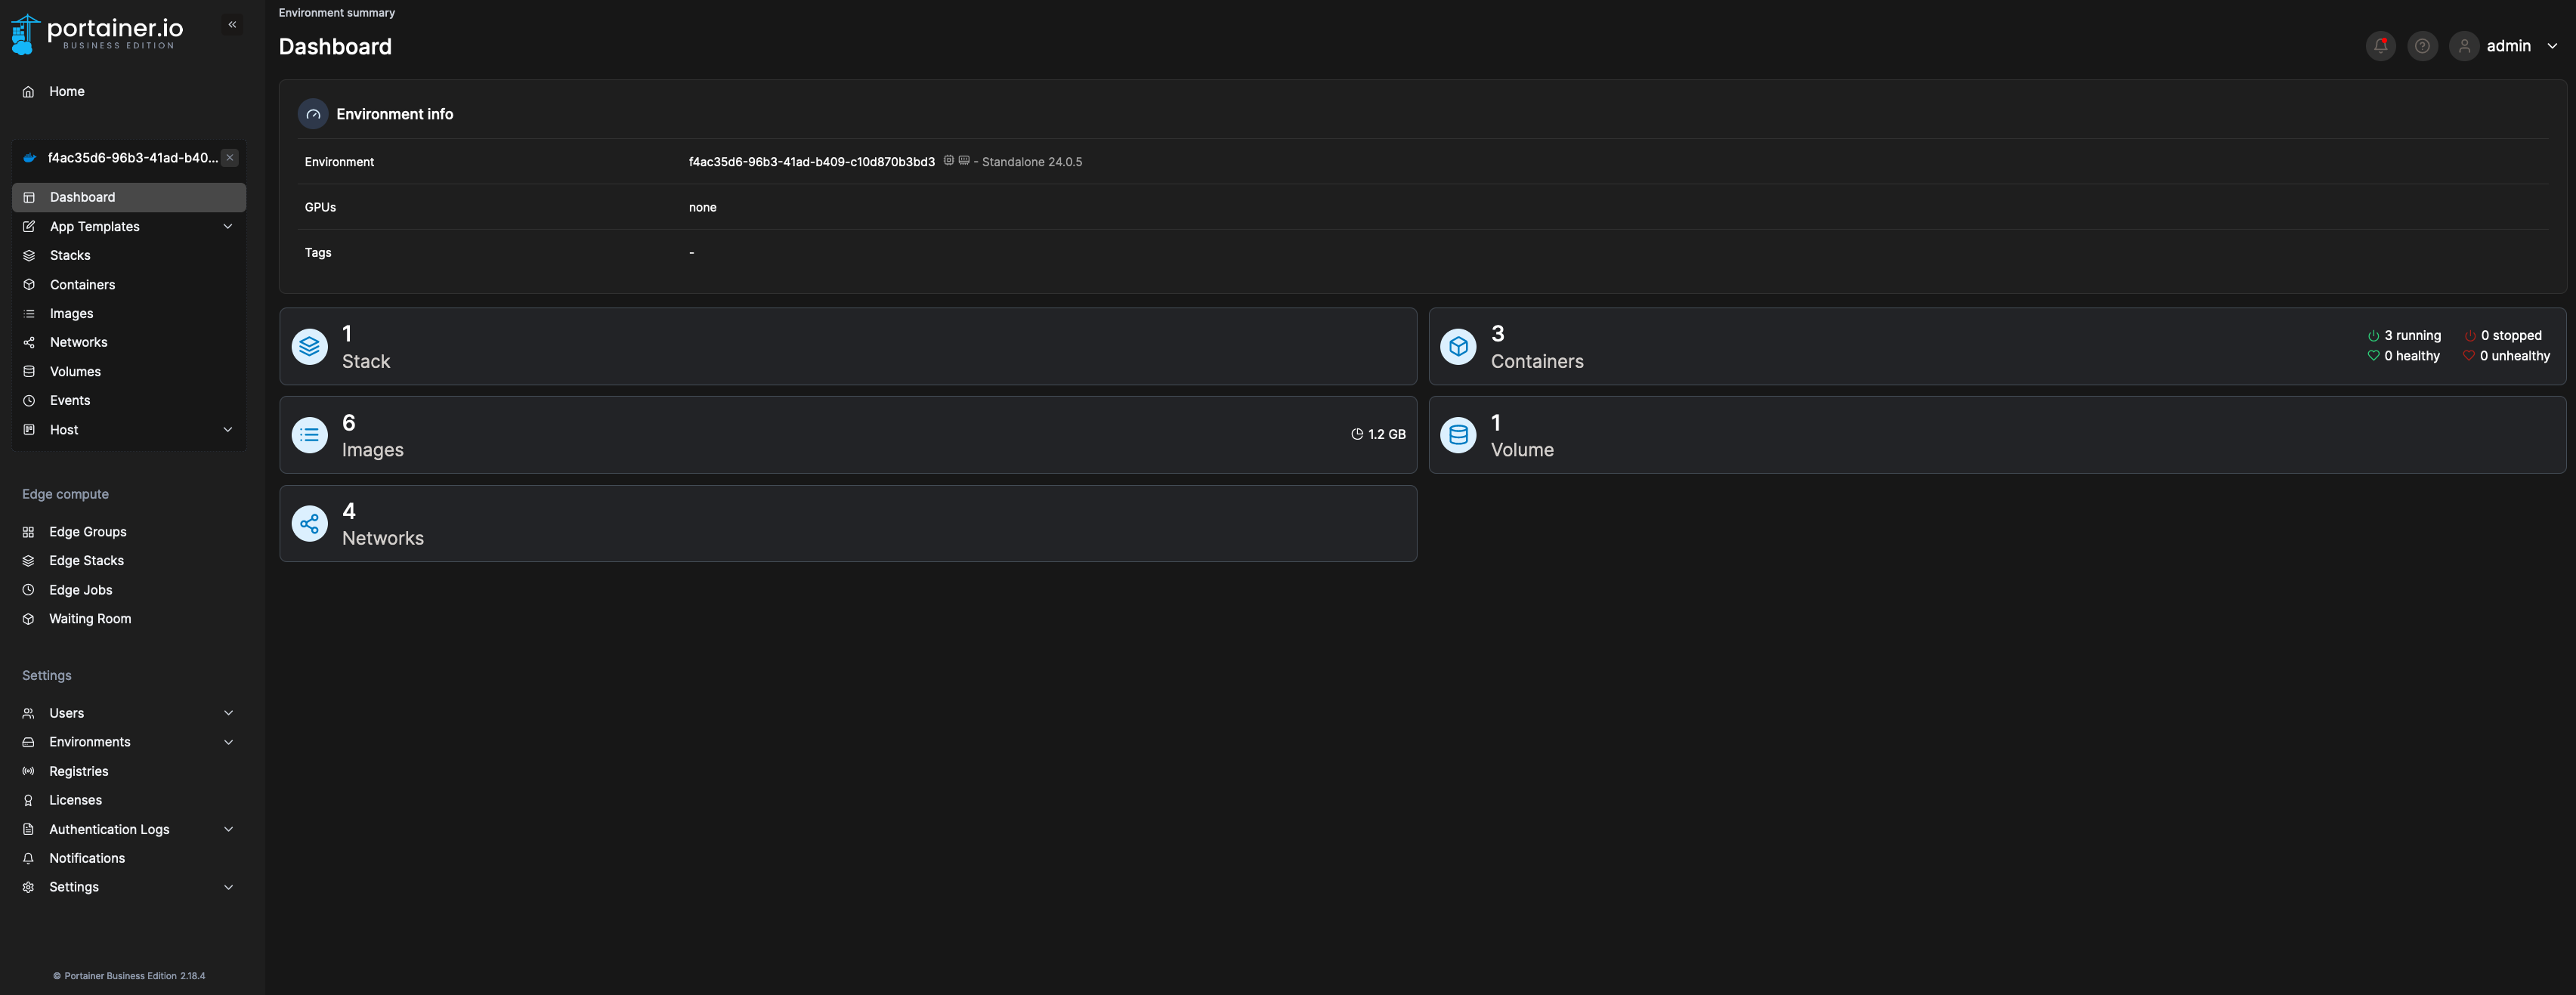
12. Clicking on the async device will lead you to take a snapshot of it:

13. Below is an example of a Standard Edge Agent with an interactive session established to browse images:
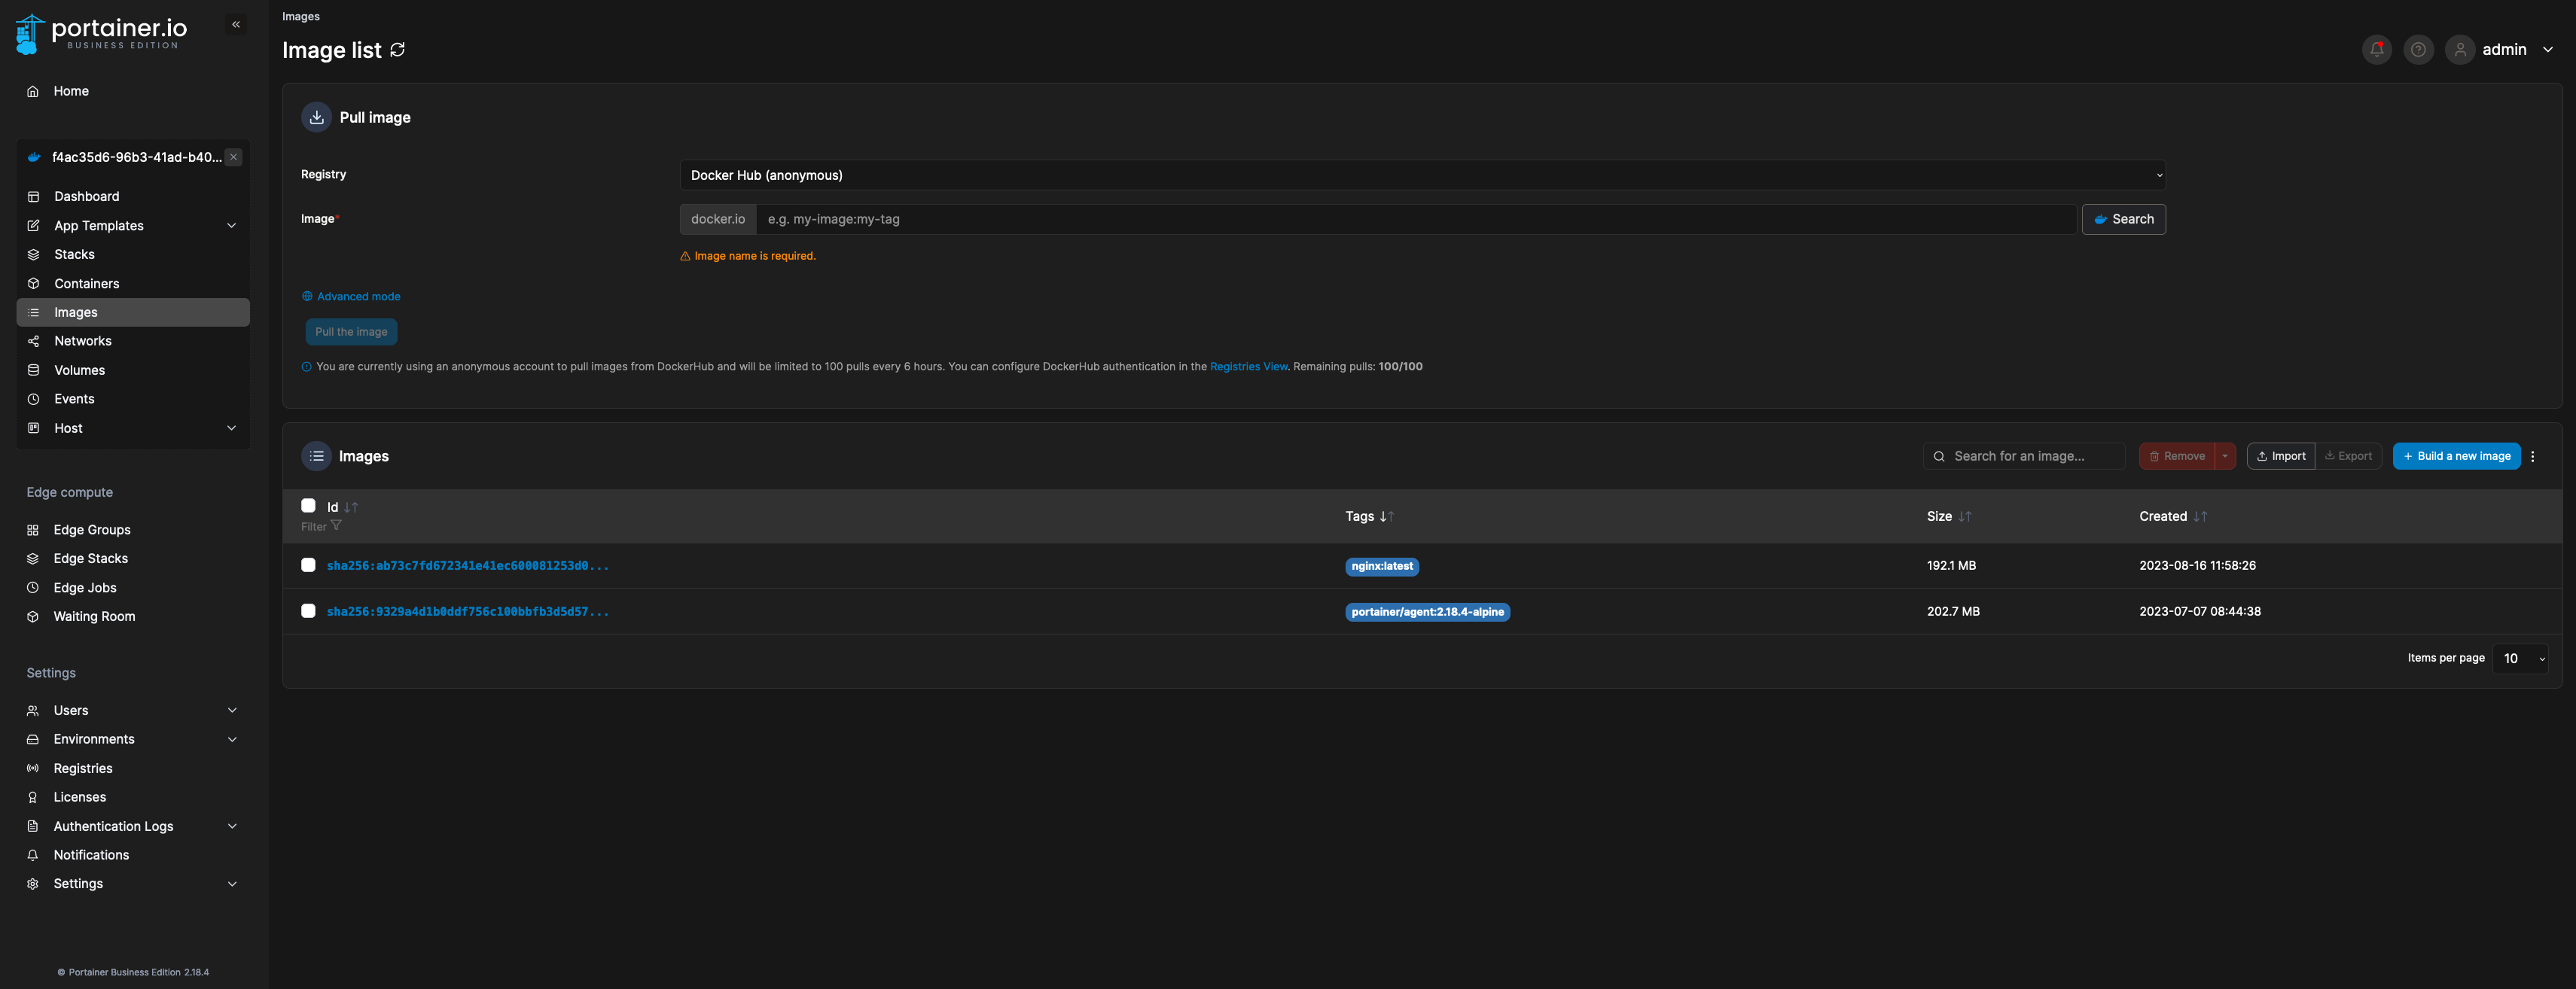
This is it! Now the Edge Agent communicates with Cloudflare with client certificates, and you can start configuring Edge Groups, Edge Stacks, and so on!
Feel free to leave a reply or reach out to me directly if you have any questions or need clarification.
Try Portainer with 3 Nodes Free
If you're ready to get started with Portainer Business, 3 nodes free is a great place to begin. If you'd prefer to get in touch with us, we'd love to hear from you!

COMMENTS